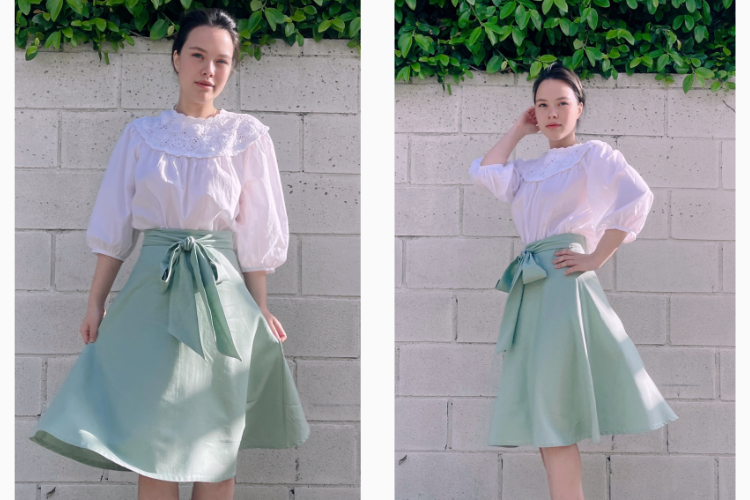
Ariel Tie-Front Flare Midi Skirt: Free Sewing Pattern & Beginner-Friendly Instructions

Get ready to create your version of the Ariel Tie-Front Flare Midi Skirt with our free sewing pattern and easy-to-follow instructions, perfect for beginners. 💗
Let’s Get Started!
Are you ready? We’ve got you covered with our free sewing pattern and easy-to-follow instructions.
💕 Size Chart:
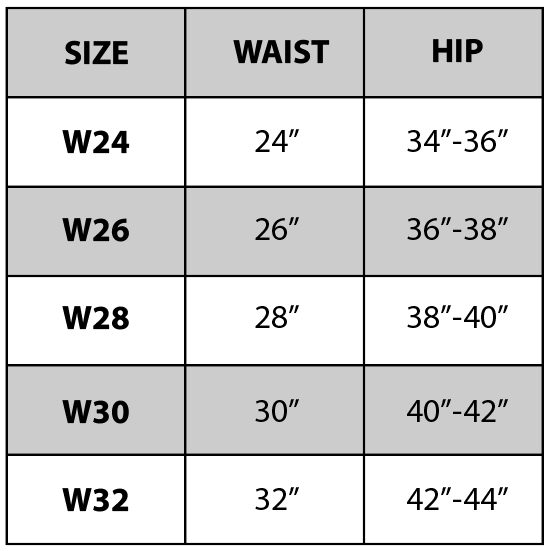
*Note: This Skirt design can accommodate various hip sizes effortlessly due to its flare design
Apologies for the limited size options for this skirt. For future free patterns, I promise there will be more sizes available. If you need this skirt in a size that’s not listed here, simply send me an email through the contact form on my website, and I’ll happily customize it for you 💗
Gather Your Materials:
- Your preferred self fabric, ensuring it is woven and does not require lining (not sheer)
- Lightweight Fusible Interfacing
- An invisible zipper, 7-9 inches (18-23 cm) in length.
- Sewing clips or pins
- Iron and ironing board
- Sewing machine, needle, coordinating thread
- Fabric scissors or rotary cutter
- (Optional)Hook & Eye Closure 1pc
- (Optional) Measuring tape, fabric marking pen or pencil, loop turner, seam ripper, pattern weights, etc.
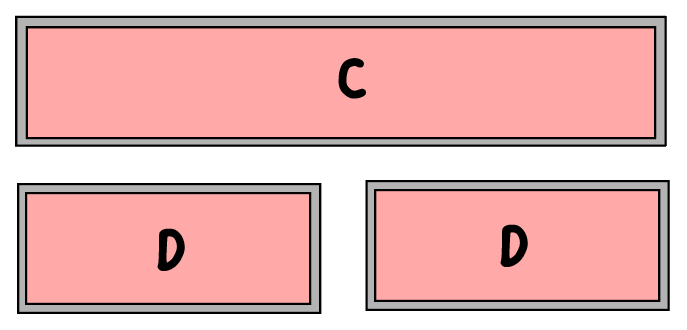
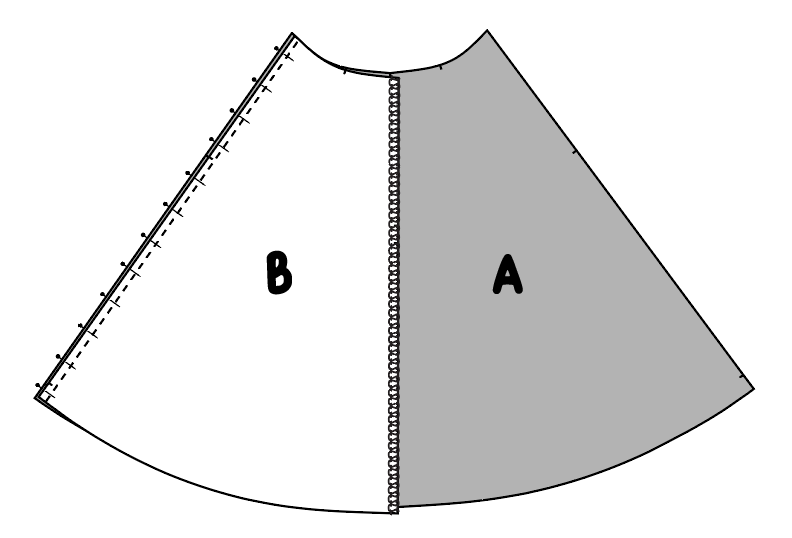
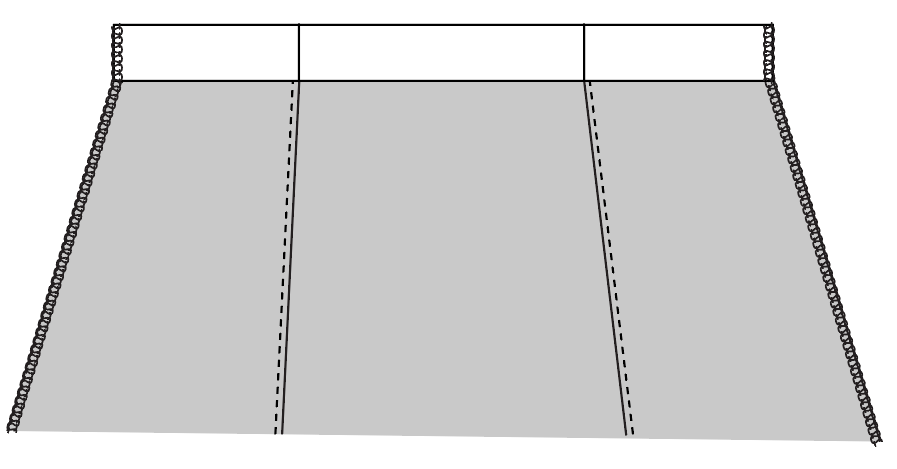
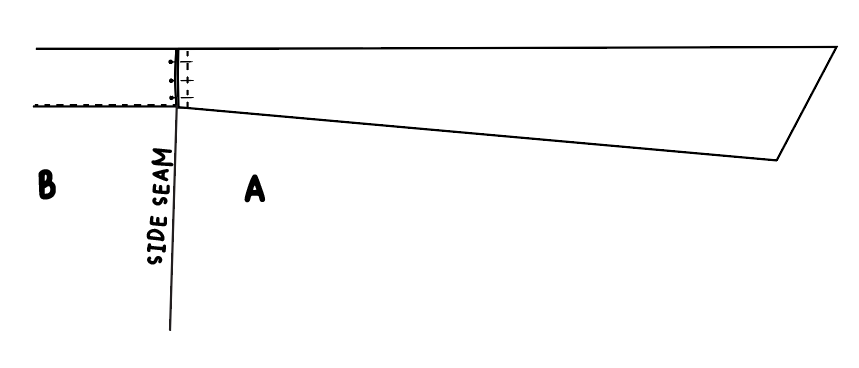
Patten Piece Inventory:
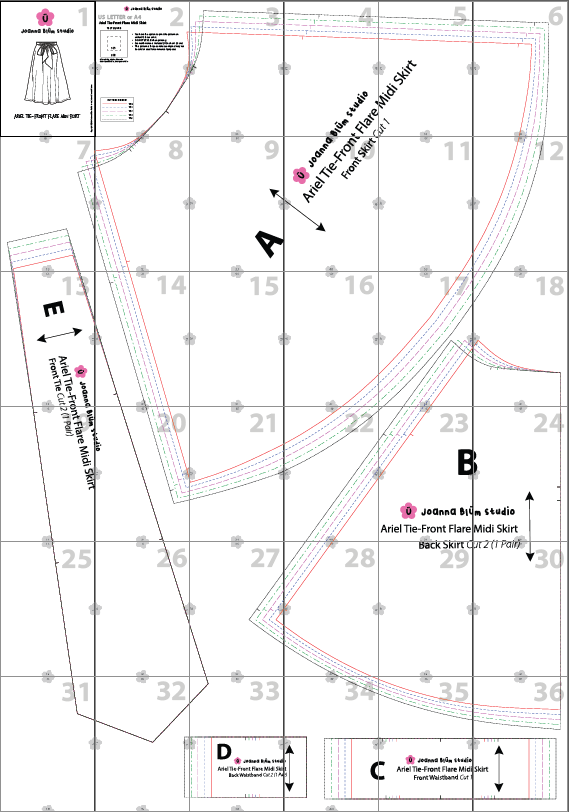
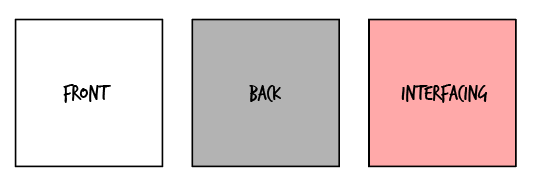
- A: Front Skirt: Self Cut 1
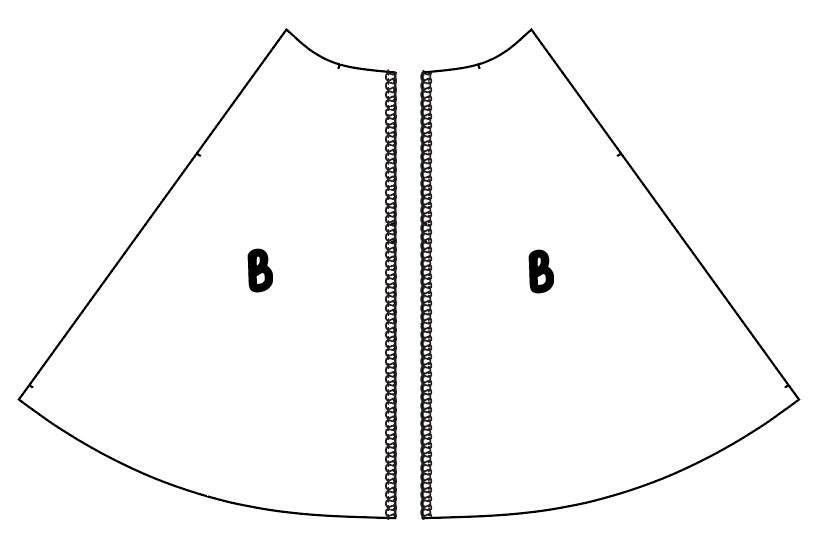
- B: Back Skirt: Self Cut 2 (1 Pair)
- C: Front Waistband: Self Cut 1, Interfacing Cut 1
- D: Back Waistband: Self Cut 2 (1 Pair), Interfacing Cut 2 (1 Pair)
- E: Front Tie: Self Cut 2 (1 Pair)
Suggested Cutting Plans (60”):
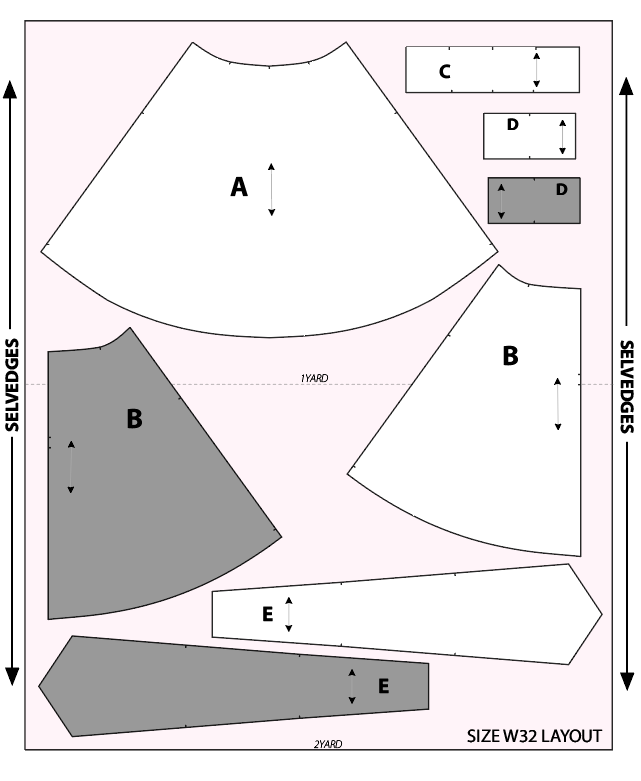
Fabric Requirement: 1.75 to 2 yards (60 inches wide), depending on the size. If you’re new to sewing and not comfortable with laying/cutting pattern pieces, I recommend getting at least 2.5 to 3 yards for preparation.
Tip: When choosing fabric, avoid narrower widths like 45 inches —they simply won’t accommodate the flare design, especially for larger sizes. Opt for wider fabrics, around 60 inches, to ensure you have enough room for cutting without any fitting issues.
Sewing Instructions:
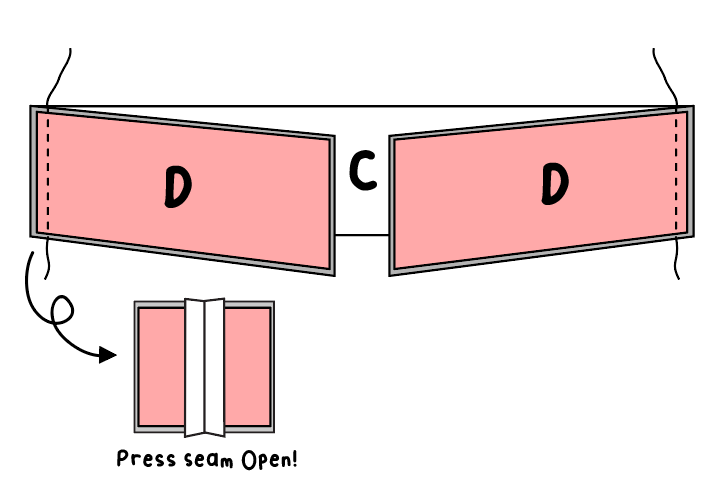
1) Prepare Waistband
-
Apply fusible interfacing onto the wrong side of the front waistband (C) and back waistband (D) using a light steam iron.
-
Align the front and back waistbands (C & D) with right sides facing each other. Stitch the side seam using a 1/2-inch wide straight stitch, then press the seam open.
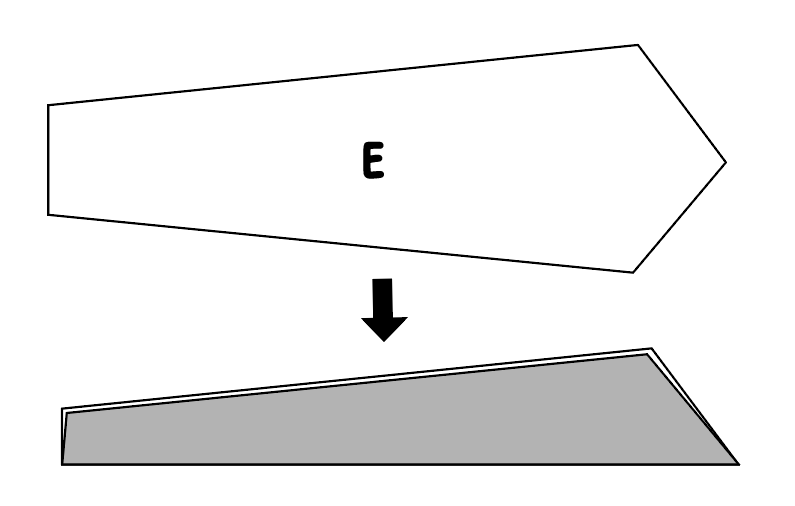
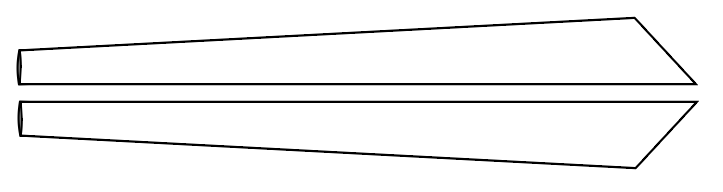
2) Prepare Front Tie
-
Fold the front tie piece (E) in half lengthwise, with the right sides together.
-
Stitch around the edges with a 1/2-inch seam allowance, leaving the bottom open.
-
Clip the corners and trim the seams.
-
Turn the piece right side out using either a tool like a loop turner or your hand. If needed, refer to this tutorial by Hipstitch Academy for assistance.
-
Press the tie well to smooth out any wrinkles, repeat for the other side.
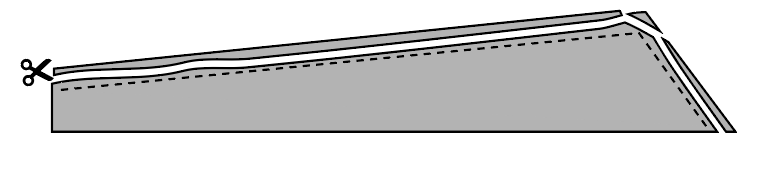
3) Overlock/Zigzag Seam Edge Treatment
-
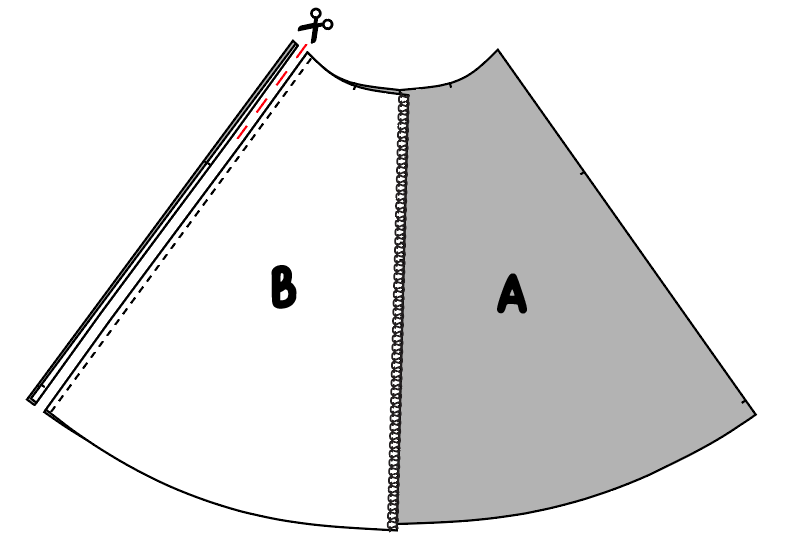
Apply an overlock or zigzag stitch to the center back (CB) seam for the back skirts (B).
-
Employ the same stitch to treat the center back (CB) seam edges for the ends of the waistband.

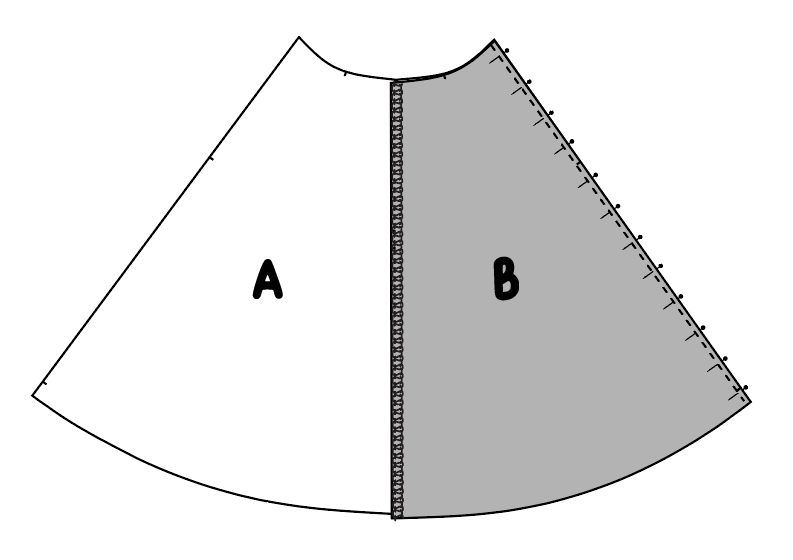
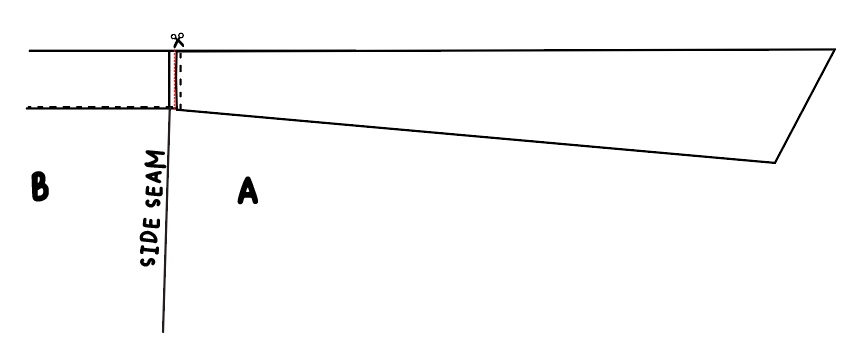
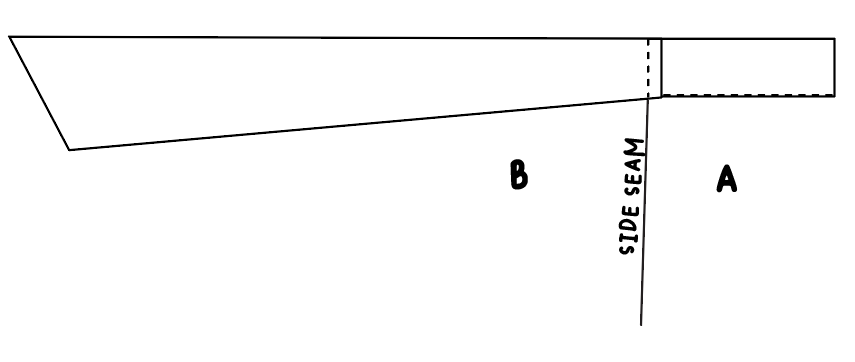
4) Attaching Skirt (Sewing Side Seams)
-
Sew the front (A) and one of the back pieces (B) together using french seams. Start by placing the pieces with WRONG sides together, then pin them securely and stitch along the seams with a 3/8” seam allowance.
-
Press the seam allowance to one side, and then trim it down by half.
-
Turn the skirt inside out and press the side seams flat. Next, pin the side seams again, this time enclosing the raw edges inside the new seams. Stitch along the pinned seams with a 1/4” seam allowance, and press the seam allowances towards the back of the skirt.
-
Repeat the same process for the other side.
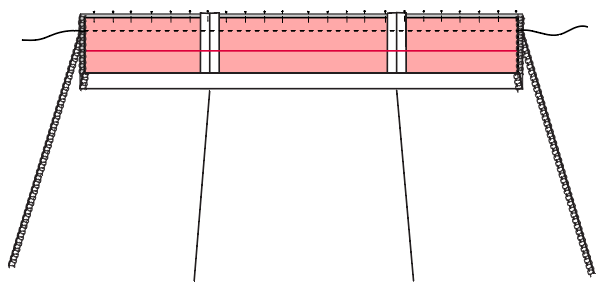
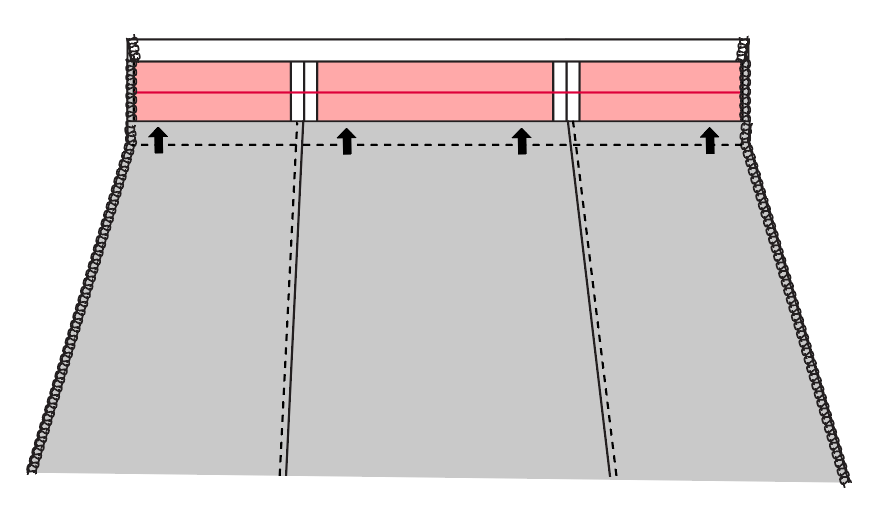
5) Attaching Waistband to the Skirt
-
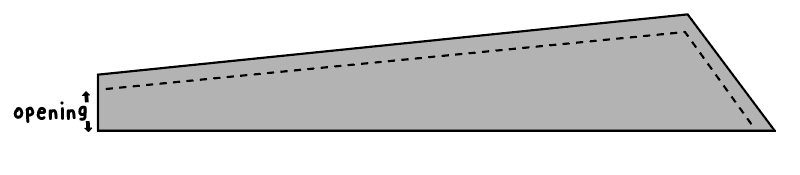
Fold the waistband in half and fold up the seam allowance (1/2”) on the bottom edge of the band. Keep the top edge raw.
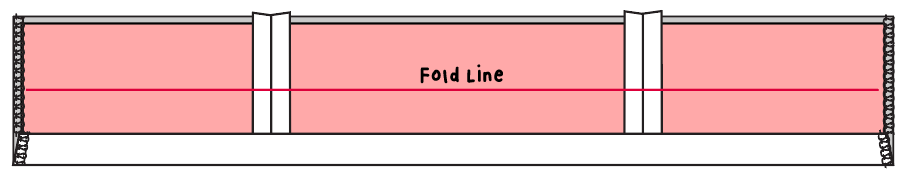
-
Align the top edge of the waistband (C+D) with the notches to the waist of the skirt, with right sides together. Stitch with a 1/2-inch seam allowance.
-
Press the seam allowance up towards the waistband.
-
Fold the waistband to the wrong side, ensuring the folded edge sits just over the seam stitching.
-
Stitch in the ditch along the waist seam.
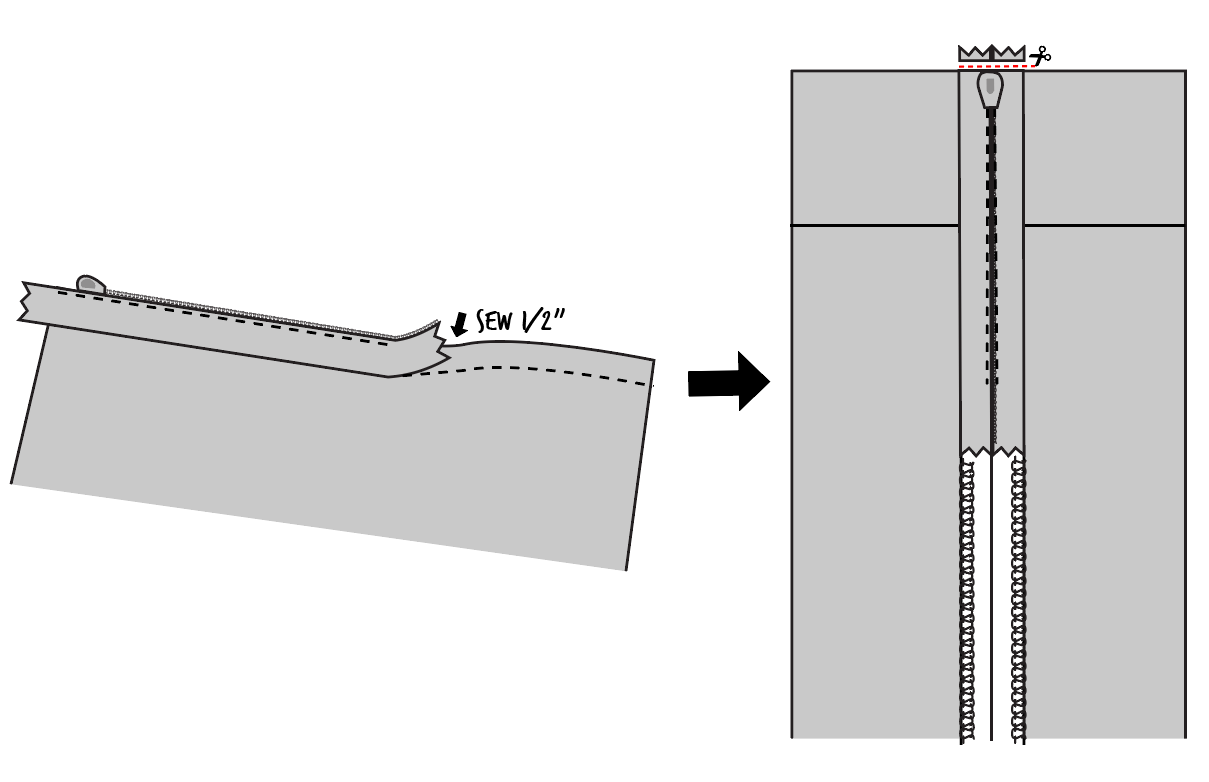
6) Attaching Front Tie to the Front Skirt
-
Position the bottom (raw edge) of the front tie on the side seam towards to the front skirt. Stitch 1/4” towards the strap.
-
Trim the seam allowance by half (1/8”).
-
Press the front tie towards the center back, then press the seam flat. Next, stitch along the seam with a 1/4” seam again to enclose the raw edge inside.
-
Press towards to the front skirt.

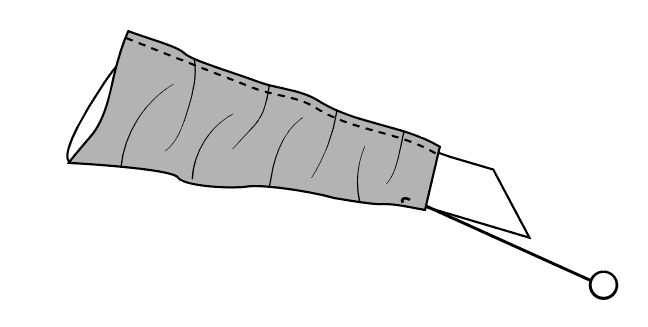
7) Inserting an Invisible Zipper
Note: Here’s a helpful video tutorial demonstrating how to insert an invisible zipper into the back of a skirt.
-
Place the zipper face down on the right side of one of the center back (CB) seam edges. Secure in place with pins or fabric clips.
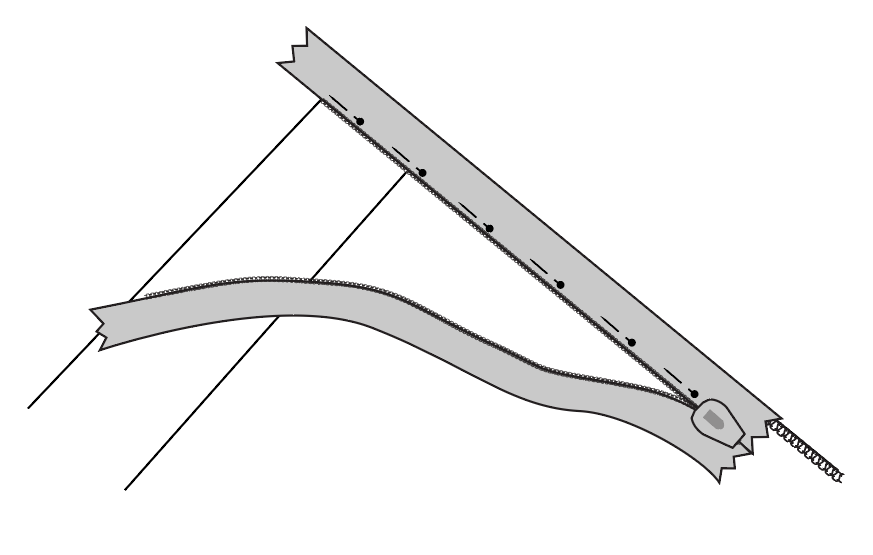
-
Using an invisible zipper foot on your sewing machine, stitch the zipper tape to the fabric along the edge, starting from the top and sewing downwards. Sew as close to the zipper teeth as possible.
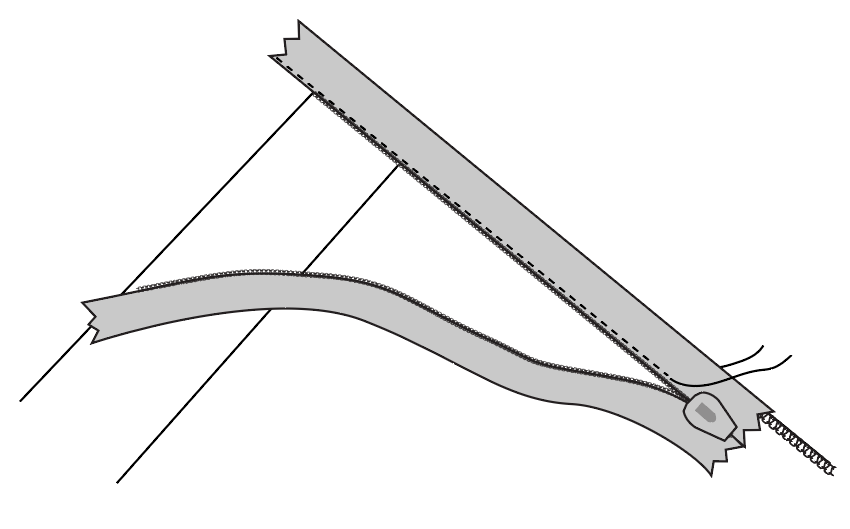
-
Once one side of the zipper is attached, close the zipper and align the other side of the zipper tape with the remaining CB seam edge. Repeat steps 1 and 2.
-
To complete, stitch the remaining CB seam below the zipper (1/2” seam), starting from the bottom of the zipper and sewing downwards. Backstitch at the beginning and end to secure the seam. Press the seam open.
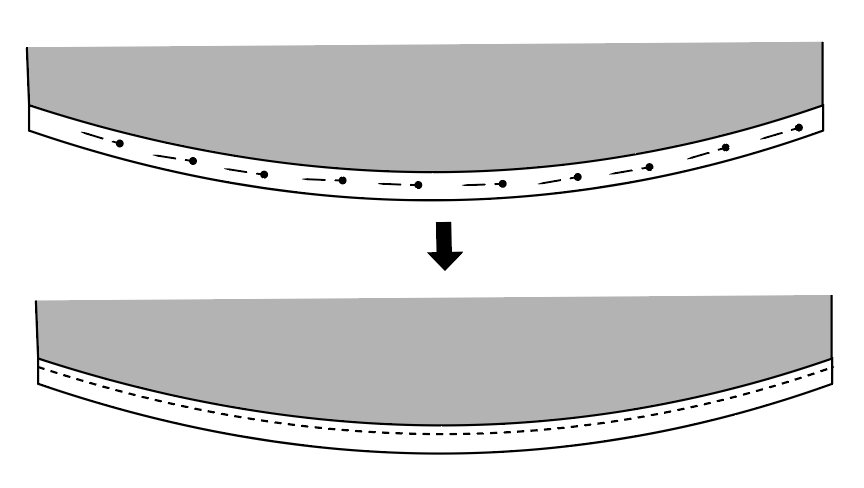
8) Sew Hem
- Turn up hem by 1/2in and press. Repeat to enclose the raw edge inside the hem.
-
Stitch close to the folded edge.
Press your work thoroughly to complete the project with finesse! Questions or stuck on a step? Feel free to get in touch—I’m here to assist you.
Remember to connect with me on Instagram @joannablumstudio and tag your photo with @joannablumstudio, #joannablumstudio and #arielmidiskirt!