Kiara Bucket Hat: Free Sewing Pattern & Beginner-Friendly Instructions
DIY your own stylish bucket hat for autumn with this easy-to-follow, beginner-friendly sewing pattern!🤠
Hello everyone!
I apologize for being MIA for so long. As some of you may know, I recently moved from Los Angeles to Upstate New York, and I plan to stay here for the next few years. Moving was tough, and adjusting to a new environment has been quite a challenge—but here we are!
I’m excited to present a new pattern for this fall: a bucket hat🤠🤠! This is a fantastic project, especially if you’re looking to use up fabric scraps. It only requires about 1/2 yard of fabric, making it perfect for small remnants you may have lying around.
I hope you enjoy this project!
Let’s get started! Here is the free pattern for download!
Patten Piece Inventory:
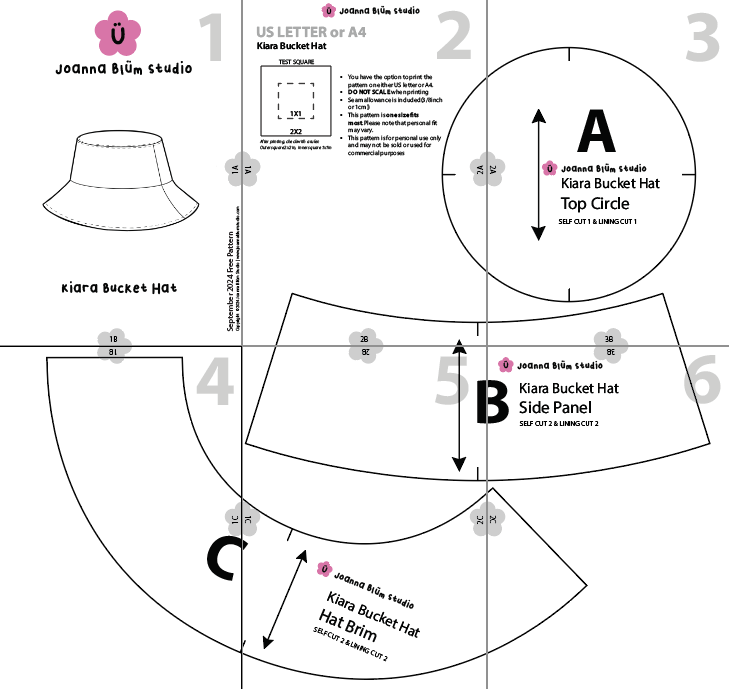
- A: Top Circle: Self Cut 1 & Lining Cut 1
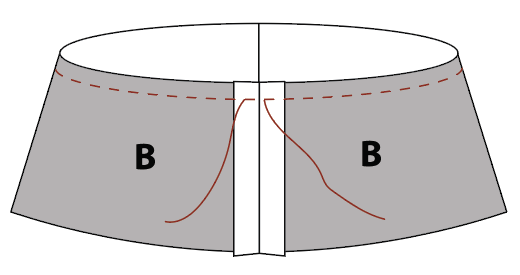
- B: Side Panel: Self Cut 2 & Lining Cut 2
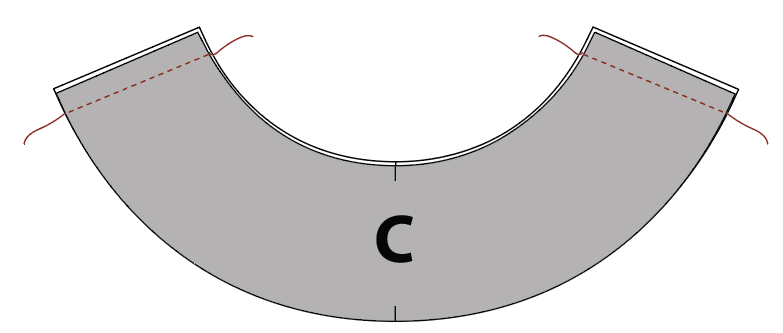
- C: Hat Brim: Self Cut 2 & Lining Cut 2
Gather Your Materials:
- Your choice of self fabric
- Your choice of lining fabric
- Sewing clips or pins
- Sewing machine, needle, coordinating thread
- (OPTIONAL)Fabric marking pen or pencil
Sewing Instructions:
-
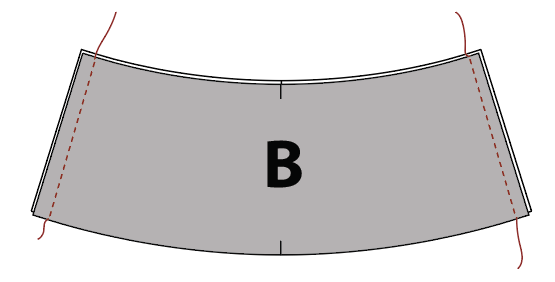
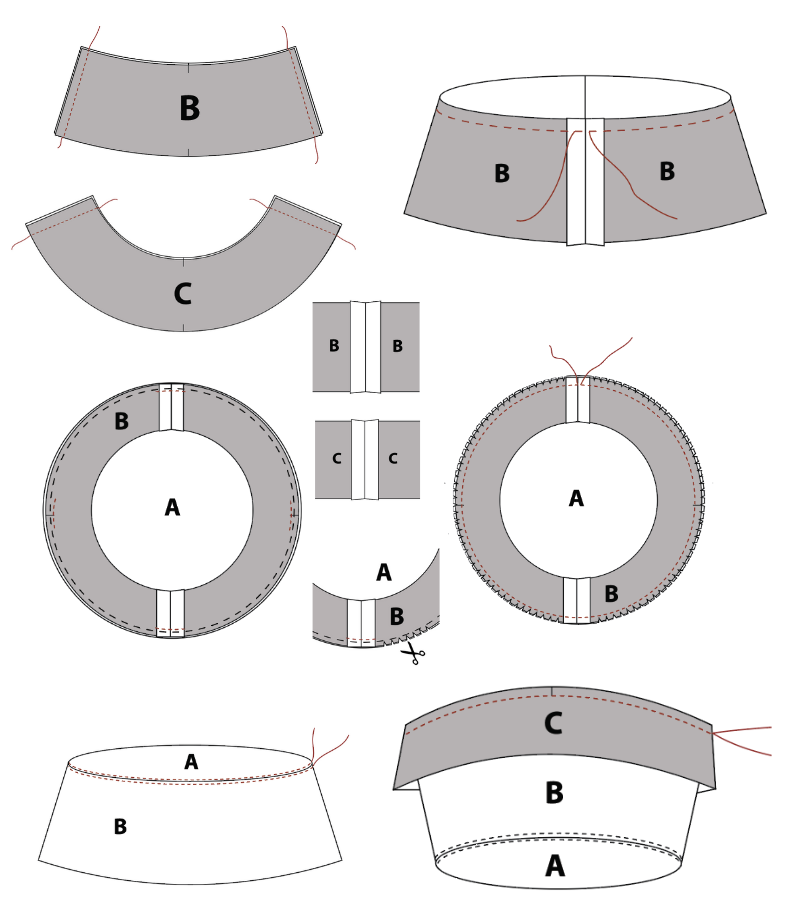
Place the Side Panel (B) with right sides together. Stitch along both short ends using a 3/8” (1cm) seam allowance.
-
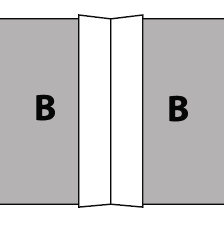
Press the seams flat and open.
-
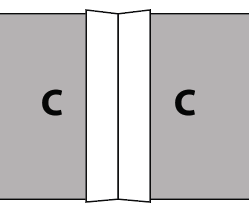
Place the Hat Brim (C) with right sides together. Stitch along both short ends using a 3/8” (1cm) seam allowance.
-
Press the seams flat and open.
-
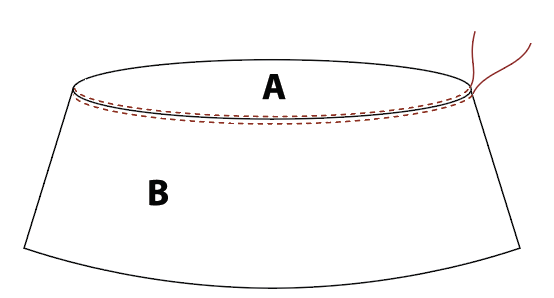
Stay stitch (baste) around the top edge of Side Panel (B) using a 1/4” seam allowance.
-
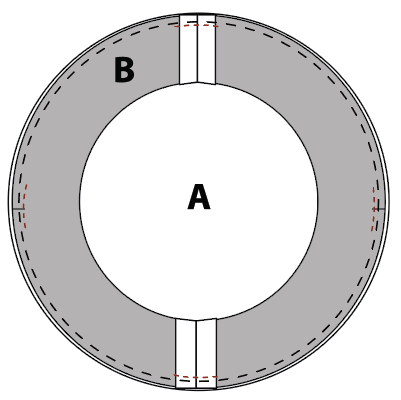
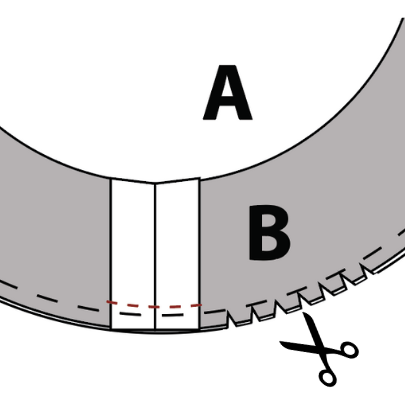
Match the notch on Piece A (Top Circle) with Piece B (Side Panel), right sides together. For Piece B, use the narrower side. Stay stitch (baste) only at the notches, leaving about 3/4” (2cm) between each tack. You’ll make about four small tacks in total.
-
Clip the edges of the Side Panel (B) to help ease it around the curve of Piece A (Top). Pin carefully.

-
Sew around the circle using a 3/8” (1cm) seam allowance.
-
Press the seam flat, directing the seam allowance toward Side Panel (B). Add topstitching on both sides of the seam where A and B meet.
-
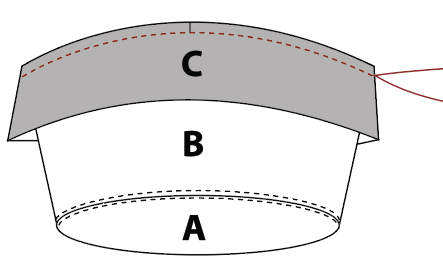
Place the Hat Brim (C) and the Side Panel (B) right sides together. Match the notches, pin in place, and sew with a 3/8” (1cm) seam allowance.
-
Repeat 1-10 with the lining fabric.
-
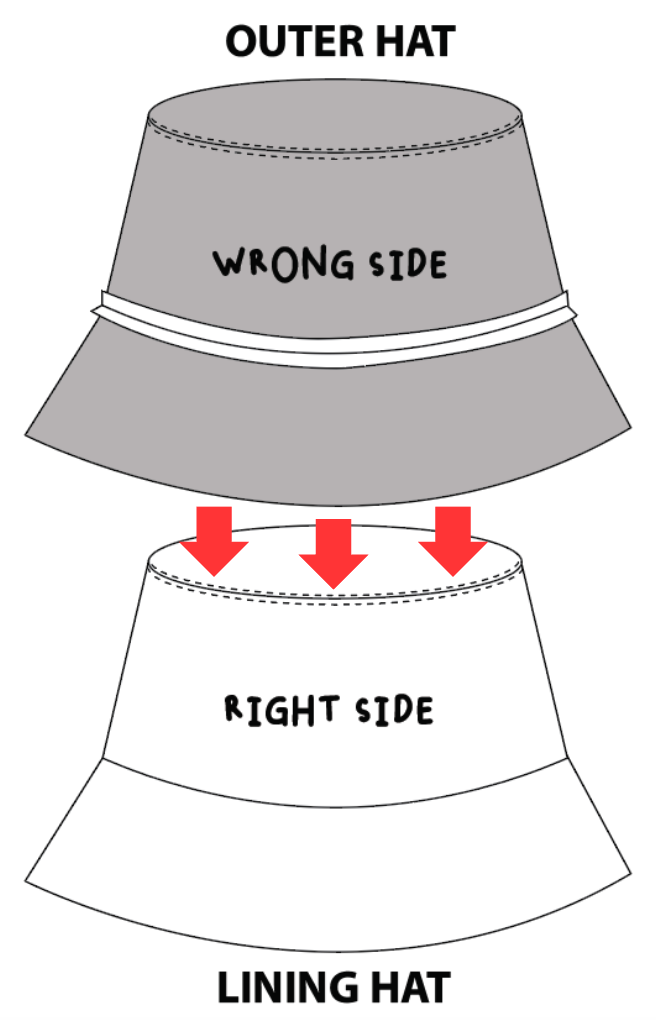
Place the outer hat and lining right sides together, matching up the seams. Pin around the brim, then sew with a 3/8” (1cm) seam allowance, leaving a 3-3 1/2” (7-9cm) opening for turning.
-
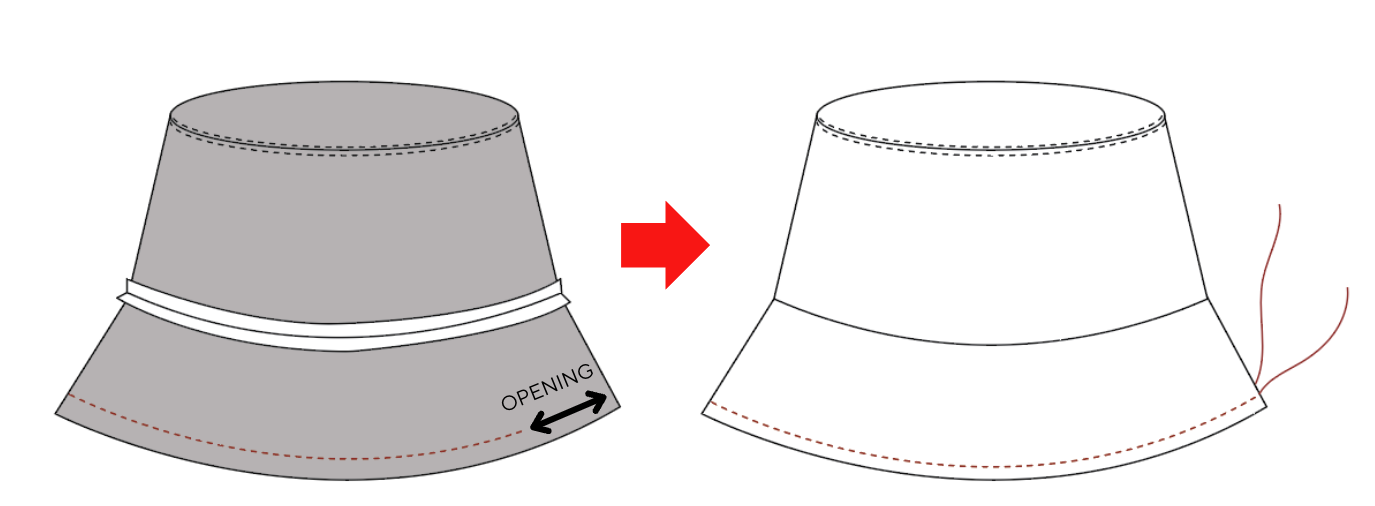
Pull the hat through the gap opening so it is right side out. Gently shape and press the brim flat. Close the gap by either hand-stitching or topstitch around the outer edge of the brim, stitching 1/4” (0.6 cm) from the edge for a neat, finished look.
💕 Support Joanna:
If you’ve enjoyed our FREE pattern and beginner-friendly instructions, consider supporting our work by donating to our coffee fund or simply subscribe to my blog! Your contributions help us continue to create and share more free patterns and sewing resources.
Click HERE to subscribe! Buy Joanna Blüm Studio a coffee 💕
Thank you for your support! ☕💕
💕 Share Your Creations:
We’d love to see your creations! Remember to connect with me on Instagram @joannablumstudio and tag your photo with @joannablumstudio, #joannablumstudio and #kiarabuckethat!
You can also connect with me on TikTok! (Though I haven’t posted anything yet, haha)
Got Questions? Feel free to shoot us an email through the contact form