Easy DIY Big Bow Tote Bag Tutorial with Free Sewing Pattern

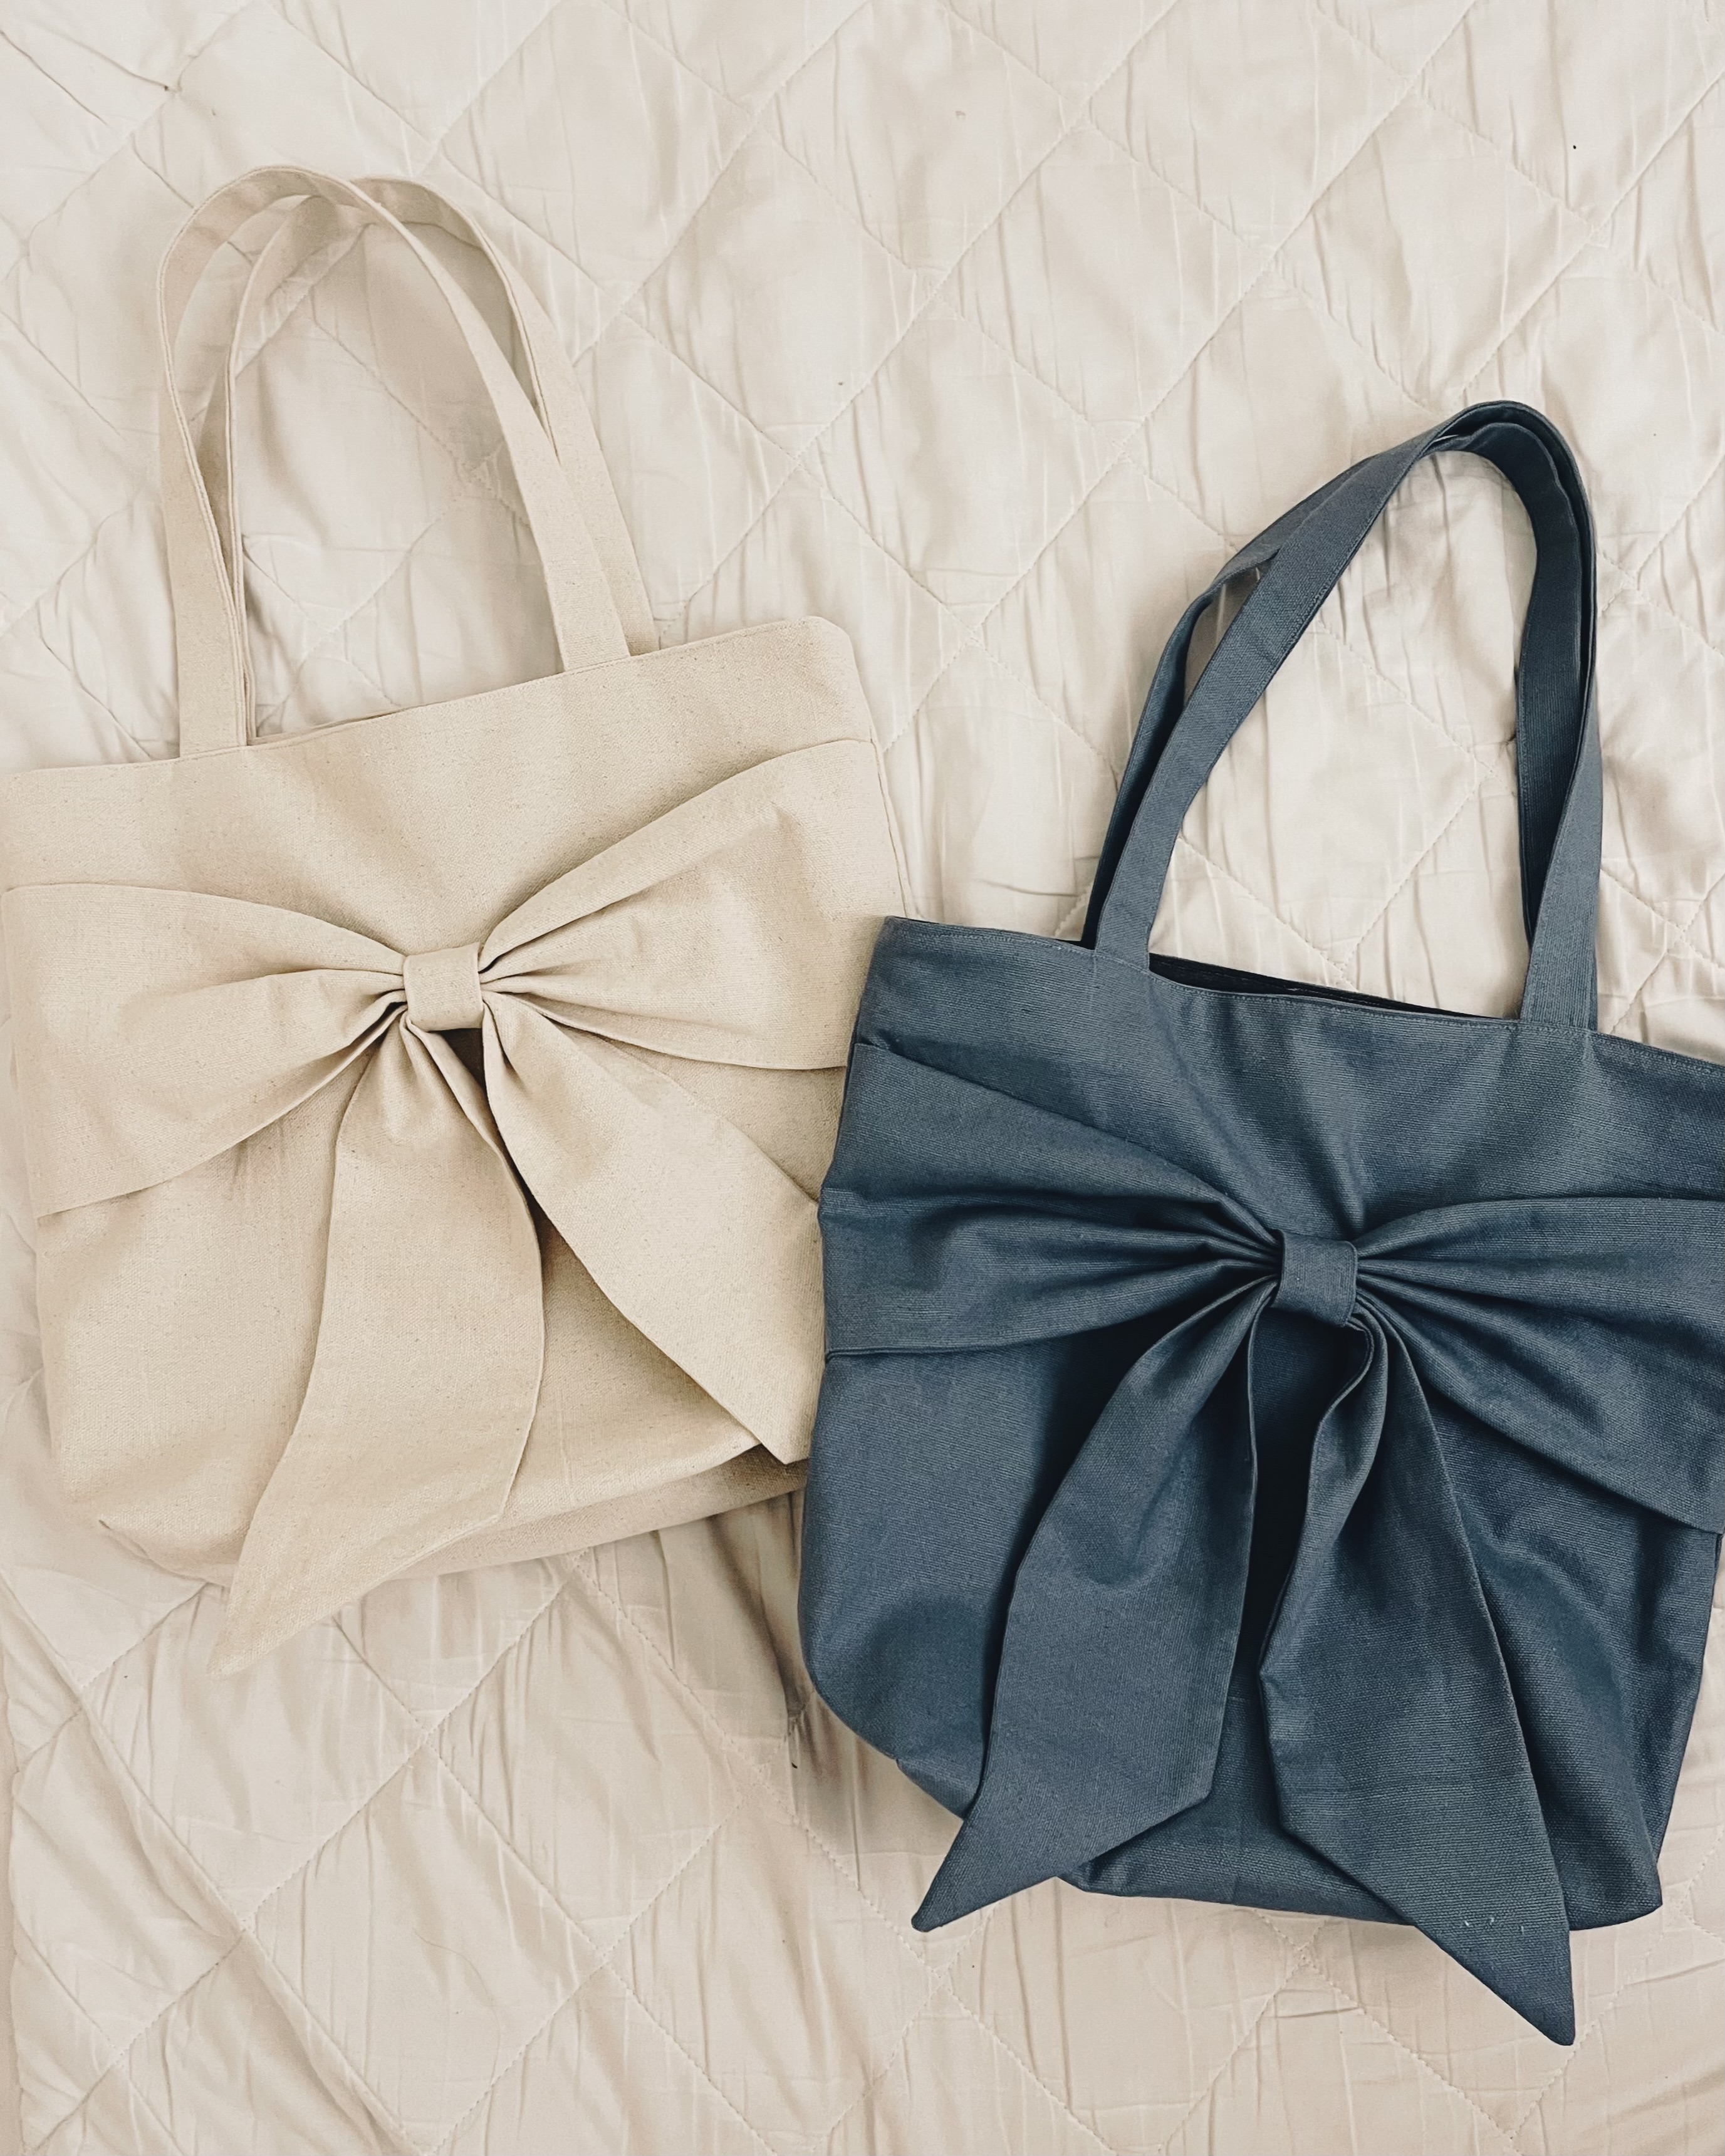
Design a cute DIY-Melisa Big Bow Tote Bag 🎀 with our beginner-friendly guide with free sewing pattern, featuring the latest big bow trend. Create a stylish and durable tote! — perfect for beginners!
After my friend surprised me with a stunning big bow crochet bag for my birthday, I felt inspired to reciprocate the gesture with a special handmade creation. She always had trouble finding a tote that nailed both style and durability. After a few attempts (okay, three prototypes), I nailed it! The unexpected love for this tote bag had people clamoring for a pattern or tutorial, so here it is! 💕
As I gear up to offer top-notch patterns for sale (coming soon), I’m eager for your feedback on this one. Drop a comment below or shoot me an email – I’d love to hear your thoughts!
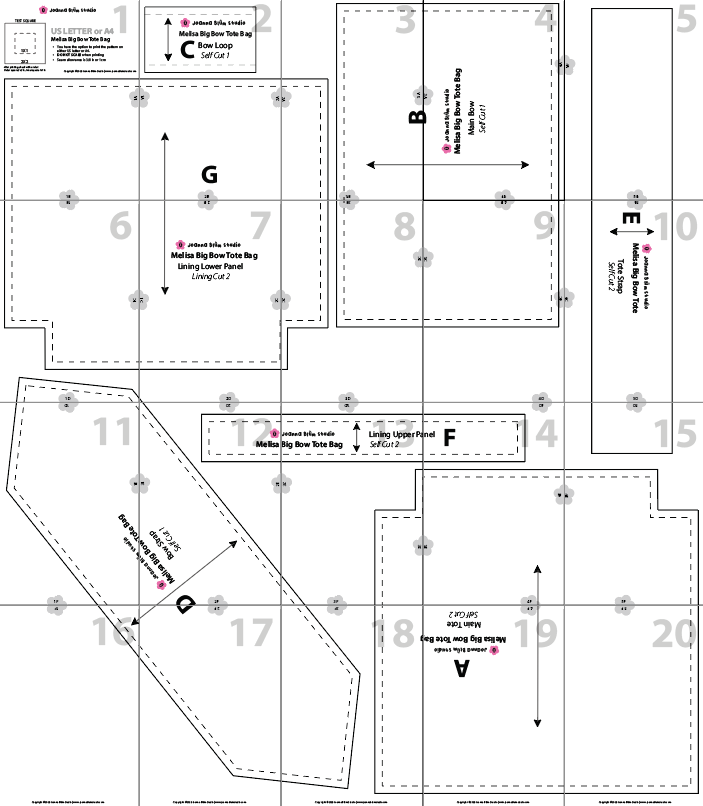
Let’s get started! Here is the free pattern for download!
Patten Piece Inventory:

- A: Main Tote: Self Cut 2 (1 Pair)
- B: Main Bow: Self Cut 1
- C: Bow Loop: Self Cut 1
- D: Bow Strap: Self Cut 1
- E: Tote Strap: Self Cut 2 (1 Pair)
- F: Lining Upper Panel Self Cut 2 (1 Pair)
- G: Lining Lower Panel Lining Cut 2 (1 Pair)
Gather Your Materials:
- Your choice of self fabric (Medium to Heavyweight Canvas Fabric, 3/4 - 1 yard needed)
- Your choice of lining fabric (1/2 - 3/4 yard needed)
- Fabric marking pen or pencil
- Sewing clips or pins
- Sewing machine, needle, coordinating thread
- Tools for hand stitching
- (OPTIONAL) Sew-In Magnetic Snap Buttons
Sewing Instructions:
Part 1: Preparing Tote Strap
-
Start by folding the fabric (E) in half lengthwise(wrong side together) and pressing it.

-
Unfold the rectangle, then fold both sides towards the middle and press.

-
Fold the rectangle along the middle line and press it closed once more. Secure the folds with a top stitch to create the strap.

Part 2: Prepare the Bow Part
-
Fold fabric (B) in half lengthwise (right side together) and stitch with a 3/8” seam allowance, but avoid stitching the sides—focus on the lengthwise part.

-
Flip it and press well to flatten and refine its appearance.

-
Create 4-5 pleats in the middle using your finger, then pin them together.

-
Hand-stitch to secure the pleats in the middle.

-
Fold fabric (D) in half lengthwise (right side together).

-
Stitch all around with a 3/8” seam allowance, leaving an opening of about 3” to facilitate flipping, preferably in the middle.

-
Trim the corners and flip it using the opening.

-
Press well to flatten then top stitch the opening or use a ladder stitch by hand.

-
Fold fabric (C) in half lengthwise (right side together).

-
Stitch only the lengthwise part with a 3/8” seam allowance.

-
Flip it using a spaghetti turner or a similar tool for easy flipping.

Part 3: Attaching Bow to the Front Tote
-
Fold fabric (A-front piece) in half and mark the center front (CF). From the CF, measure 4 1/2” down, then mark the loop placement (on the right side of the fabric) - use an erasable pen or fabric marker pen.

-
Position one side of fabric (C) towards the top of (A-front piece) at the marked loop placement, then stitch with a 1/4” seam allowance

-
Position pieces (B) and (D), determining the space needed for the loop. Ensure it is snug but not overly tight. In my case, I had to trim the loop piece (C) to 3 1/4”, including a 1/4” seam allowance for the next step.

-
Hand-stitch the bottom loop securely, ensuring a strong attachment.

-
Once the loop is secure, position pieces (B) and (D) into the loop. Place piece (B) 2 1/2” down from the top of (A).

-
Stay-stitch with a 1/4” seam allowance to firmly hold (B) in place on the sides of (A).

Part 4: Attaching Strap to the Tote
- Position one of the strap pieces (E) 4” from the side of the A-front piece, ensuring that the top-stitched area is placed inside (with the folded area outside).
-
Stay-stitch securely at 1/4”. The handle should be oriented towards the bottom of the A-front piece.

-
Once completed, repeat the same process for the A-back piece.

Part 5: Attaching Self Tote Pieces Together
- With the A-front piece and back piece right sides together, stitch the sides and bottom with a 3/8” seam allowance—don’t worry about the corners yet.
-
Once completed, press all the seams open.

-
Align the corner piece so that the opened seams of the side and bottom meet at the center of this straight line. Stitch with a 3/8” seam allowance. Repeat the process for the other corner.

Part 6: Attaching Lining Tote Pieces Together
- With F (upper lining panel) and G (lower lining panel) right sides together, stitch with a 3/8” seam allowance.
- Press the seam towards the upper panel, then top stitch.
-
(OPTIONAL) If you want to attach snap buttons, now is the time.

- Use the instructions in part 5 to attach the lining tote pieces together.
Part 7: Attaching Everything Together
-
Insert the Lining Pieces inside the Exterior Pieces with right sides together. Line up side seams.

- Pin in place and repeat on the opposite side of the bag. BE SURE TO LEAVE A 3” OPENING FOR TURNING YOUR BAG, preferably at the CB area.
-
Using a 3/8” seam allowance, stitch around the top edge of your bag.

Part 8: Finishing Up
- Turn your bag right side out and carefully press the top seam.
-
Top stitch around the entire top of the bag.

Give everything a good press and you’re all done! YAY. If you have any questions or are stuck with any instructions, please feel free to contact me anytime.
Don’t forget to find me on Instagram @joannablumstudio and tag your photo with @joannablumstudio, #joannablumstudio and #melisabigbowtotebag!

