How to Sew Bound Buttonholes
Learn to create professional-looking bound buttonholes for your coats and jackets.
Overview
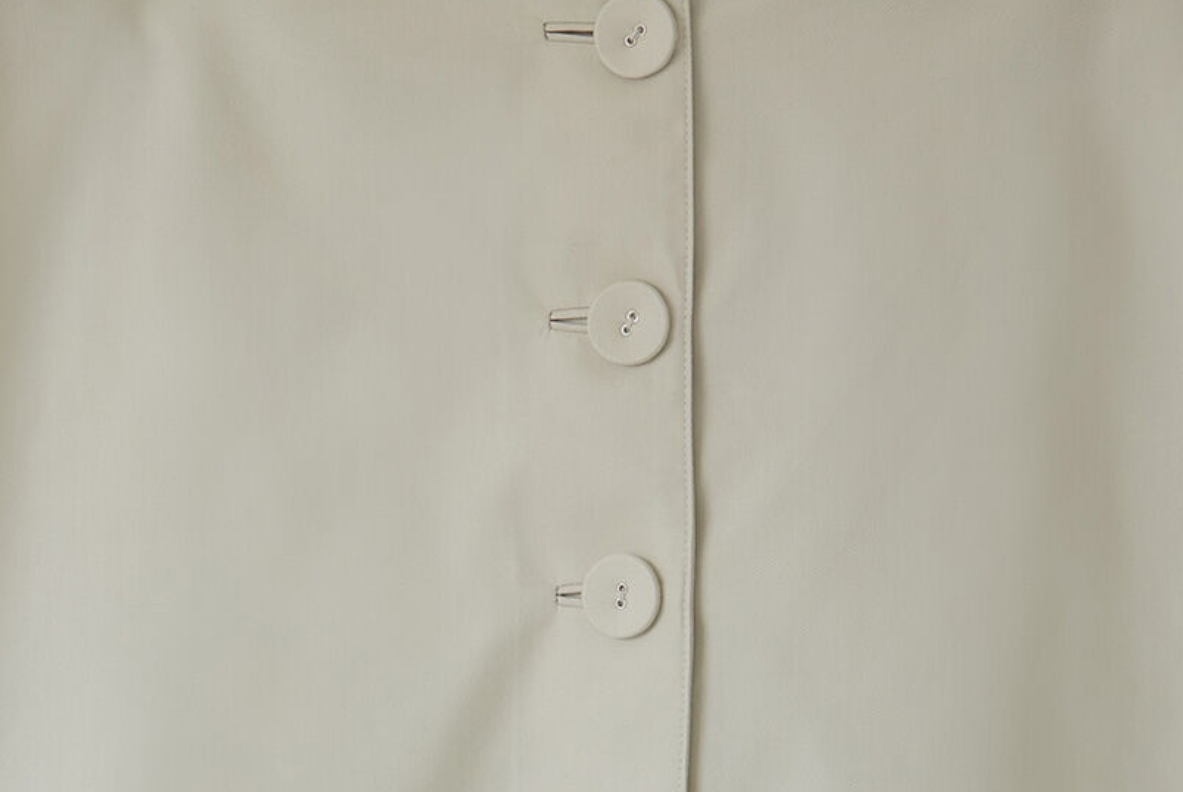
Bound buttonholes are an elegant detail that elevates any coat or jacket. While they require more time than machine-made buttonholes, their sophisticated finish is worth the extra effort. They can be sewn in matching or contrasting fabric for a unique design element, and they’re an excellent alternative when your sewing machine’s buttonhole function isn’t cooperating 🙄🙄🙄
Gather Your Materials:
- Fabric
- Lightweight Fusible Interfacing
- Erasable Pens or pencil
- Sewing clips or pins
- Sewing machine, needle, coordinating thread
- Tools for hand stitching
Instructions:
Step 0: Measure Your Buttonhole
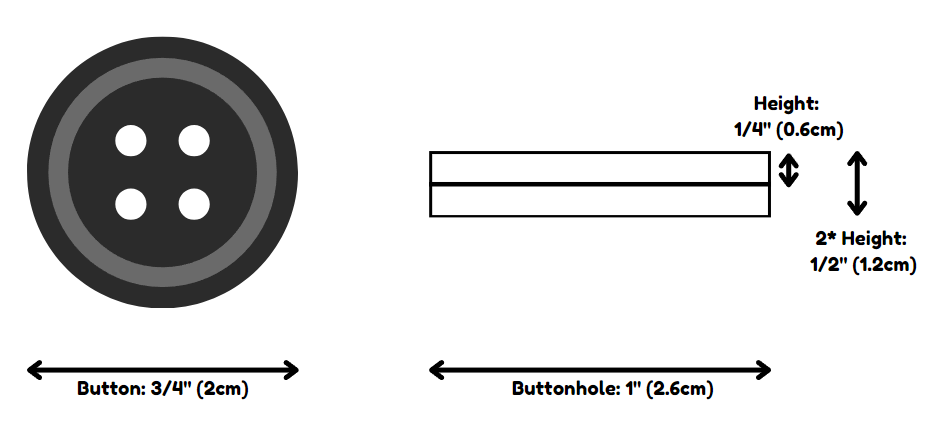
- Calculate width: Measure button diameter + 0.6cm (1/4”) for ease
- ex) 2cm (3/4”) button needs 2.6cm (1”) wide buttonhole
- Standard height: Use 6mm (1/4”) height, doubled for the finished look
Step 1: Prepare and Mark Buttonhole Area
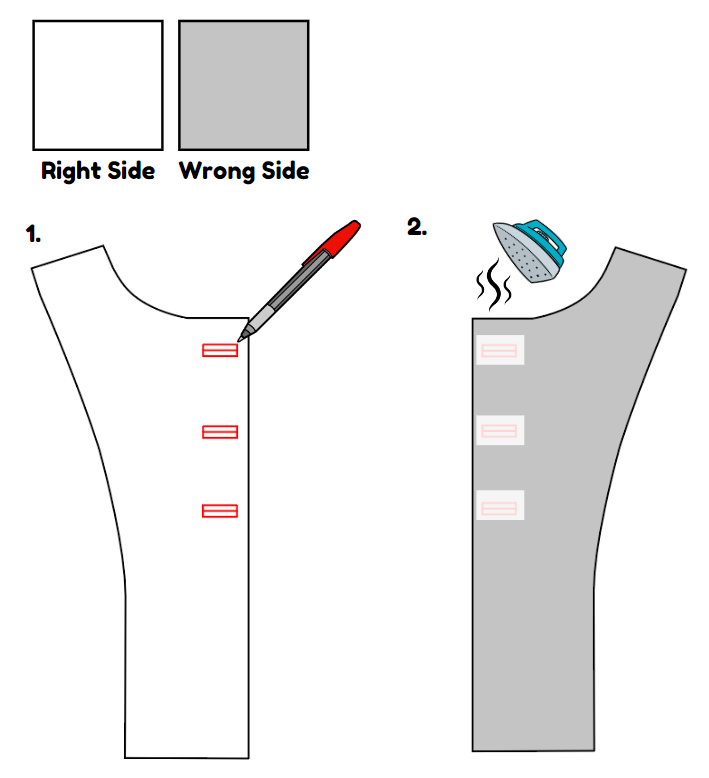
- Mark out buttonhole position on the right side of your garment where you wish to make buttonholes.
-
Cut interfacing in a rectangle that’s slightly bigger than the buttonhole rectangle, then apply on the wrong side of the garment on the buttonhole area to reinforce the fabric.
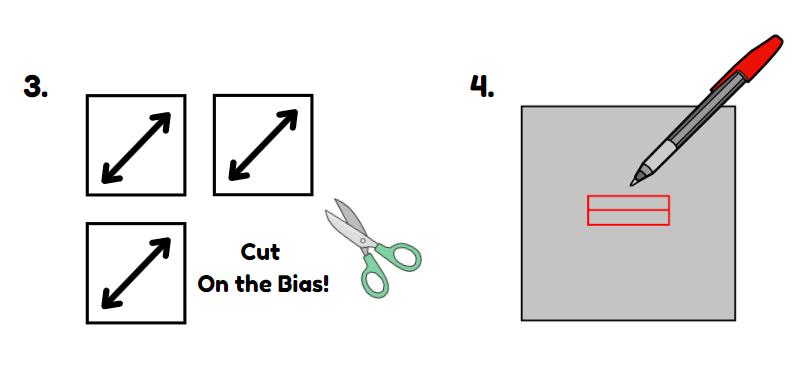
- Cut squares of fabric on the bias (one per buttonhole):
- Simple formula: Width and Length = buttonhole width X 2.5
- ex) For 2.6cm (1”) buttonhole example: cut 6.5cm × 6.5cm (2.5” × 2.5”) squares. Cut three identical bias squares for my three buttonholes
- Pro tip: While you can cut any size rectangle that’s at least 3cm (1 1/4”) longer and 5cm (2”) wider than the finished buttonhole, this simple formula (buttonhole width × 2.5) creates perfect squares that are easy to work with!
- Draw the buttonhole rectangle on the wrong side of each bias-cut square:
- Aim for the center of the square (exact placement isn’t critical)
- This will guide your stitching in the next steps
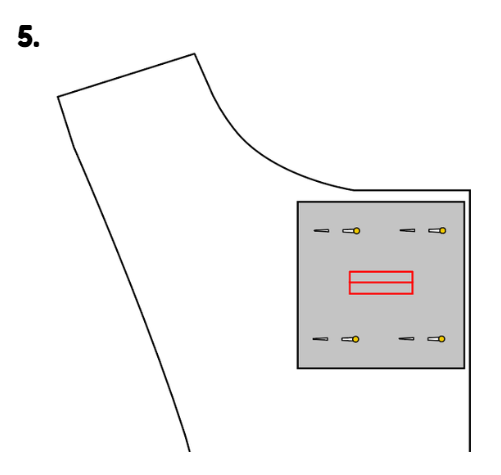
- Place each bias square right sides together with garment. Position directly over marked buttonhole area and pin securely in place
- Pro tip: Keep pins away from marked lines to avoid stitching obstacles
Step 2: Create The Buttonhole Opening
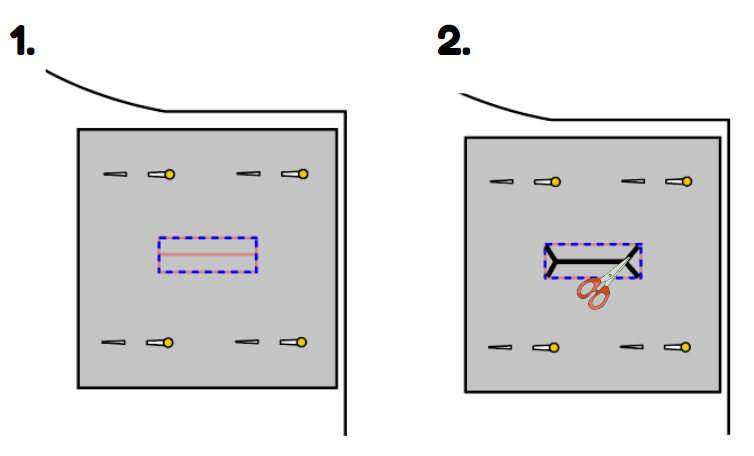
- Sew along the marked rectangle lines. Shorten your stitch length for strength and start from one of the long sides, pivoting carefully at each corner.
- Pro tip: Count your stitches on each side for perfect symmetry!
-
Cut through center of the rectangle, cutting through both layers of fabric and the interfacing (all layers!) stopping 3mm (1/8”) from each end. Clip diagonally (Y shape) toward each corner.
- Carefully pull the bias square through the slit to wrong side and press it as flat as possible, ensuring crisp edges.
Step 3: Create Buttonhole Lips
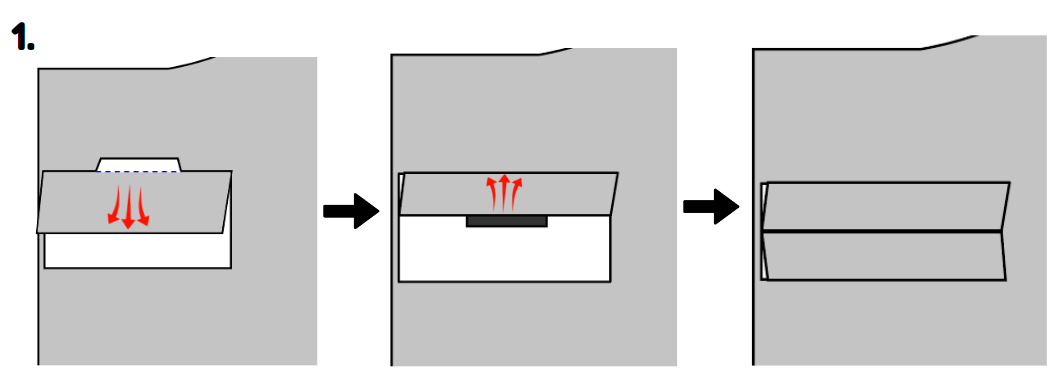
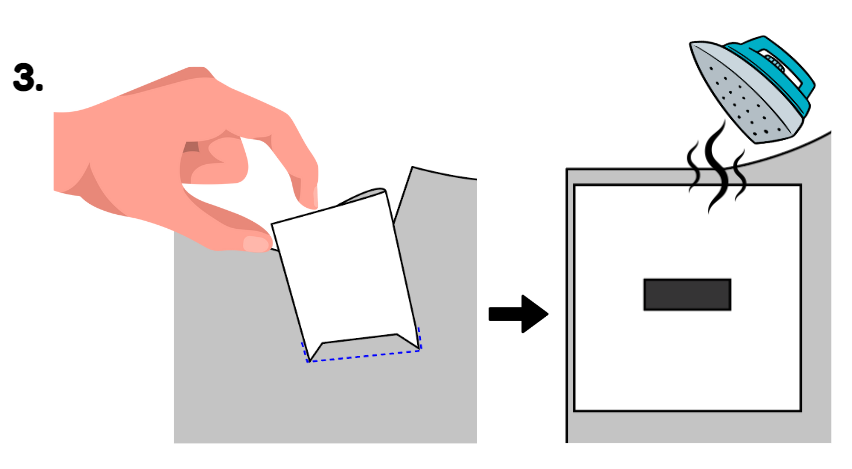
-
Form the top lip: Fold the top edge of the bias square down, then fold back up to cover half of the opening. Create the bottom lip using the same method.

- Press the buttonhole from the right side to set the folds.
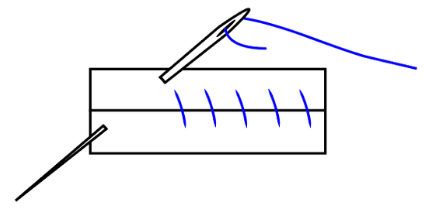
- Secure the ends: Fold back fabric at each side to expose the small triangles at the ends of the buttonhole. Sew across all layers.
- Pro tip: Use a zipper foot to stitch as close to the edge of the opening as possible.
- Secure the lips: Sew the seam allowance of the first lip to the bias rectangle, stitching directly over the previous line. Repeat for second lip.
Step 4: Finishing Touches (Optional)
- Clean up the back: Trim excess fabric from bias rectangle or serge the edge, then press flat.
- Baste the lips closed to keep them neat until ready to use.
You Did It! 🎉
Yay! You’re now ready to create beautiful bound buttonholes! While they may seem time-consuming at first, once you get the hang of it, the process becomes quite manageable. The professional finish they add to your garments makes it totally worth the extra effort.
Pro tip: Practice your first bound buttonhole on scrap fabric. Like many sewing techniques, it gets easier with each one you make! Hope this tutorial helps you level up your sewing game!