How to Thread a Juki DDL-9800 Industrial Sewing Machine
Learn How to Thread a Juki DDL-9800 Industrial Sewing Machine.
Hey everyone! After a busy August moving from LA to upstate New York for grad school, I’m back and excited to share something useful. As a TA for an intro fashion design class, I noticed a lack of clear guides for threading Juki DDL-8700 industrial sewing machines. So, I created this step-by-step tutorial to help my students and fellow sewers.
Whether you’re a beginner or a pro, this guide will streamline your sewing setup. Got Questions? Feel free to shoot us an email through the contact form. ✨💗
Step 1: Place the Thread Cone
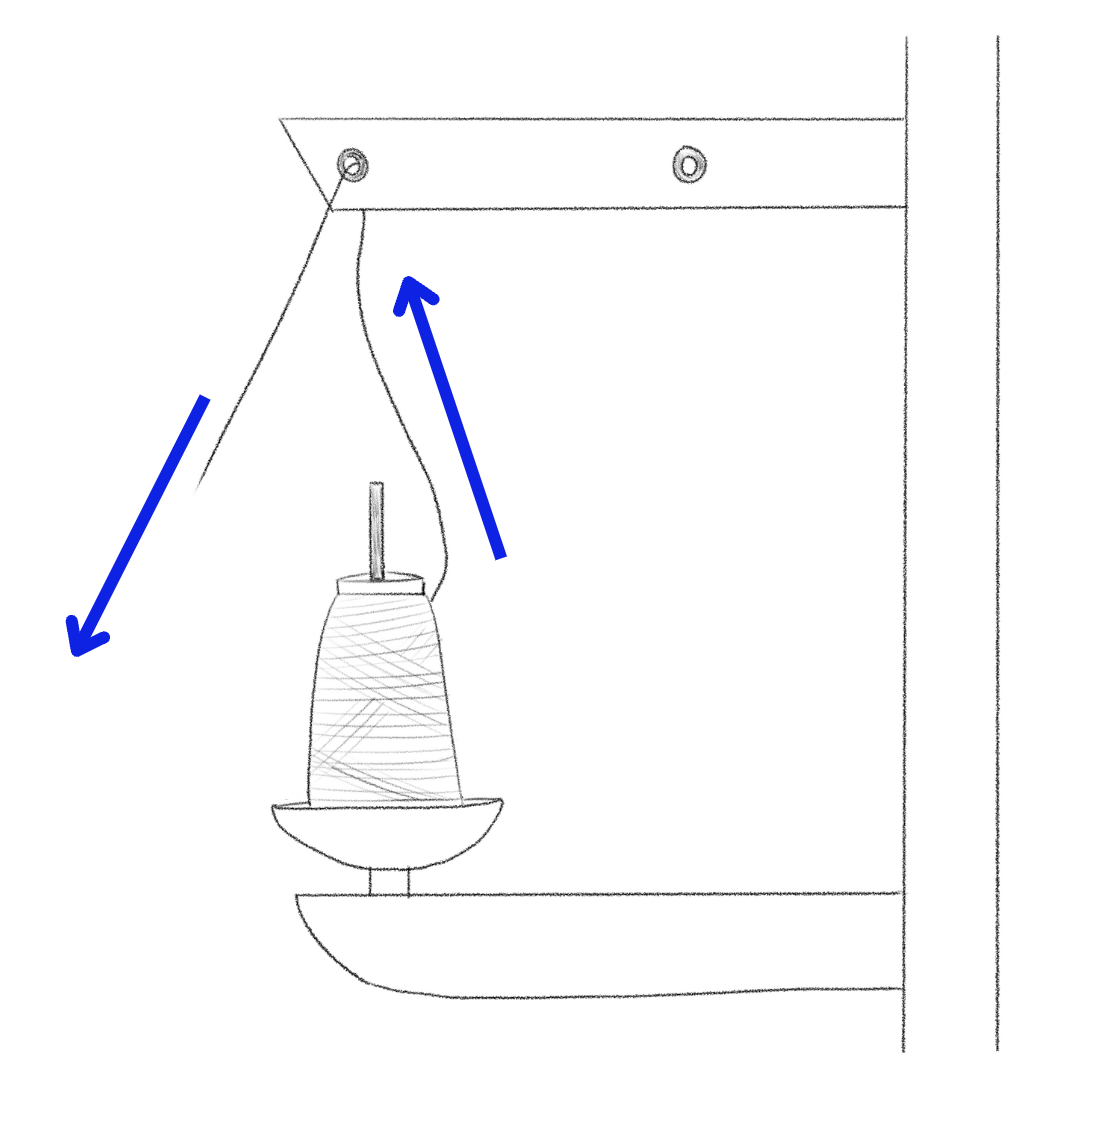
- Place the thread cone on the preferred thread stand column.
- Pull the thread from the cone and guide it through the small hole at the top of the thread stand, from back to front.
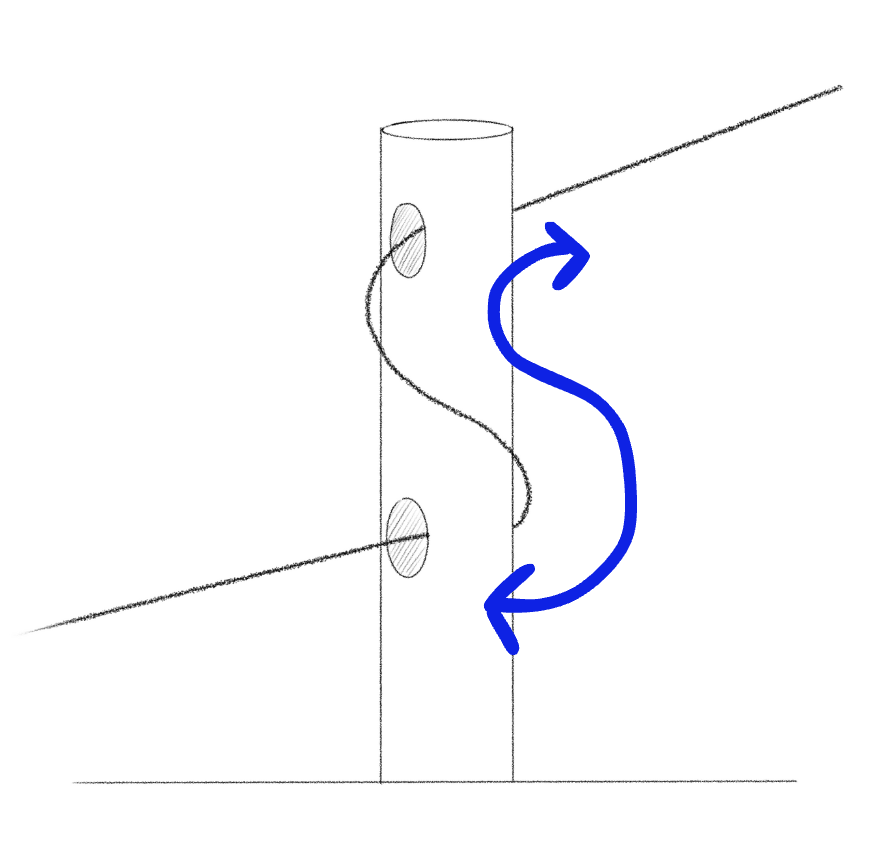
Step 2: Thread the Upper Thread Guide
-
Bring the thread down to the first upper thread guide (near the top of the machine).
-
Create an ‘S’ shape by threading it through the first hole from right to left, then wrap it around and thread it through the second hole from right to left.
Step 3: Thread the Tension Discs
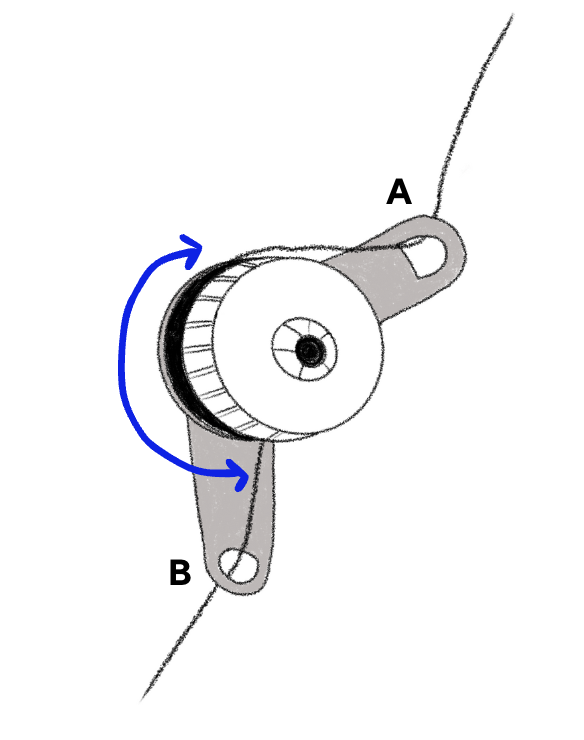
- Pull the thread to the two-pronged tension assembly.
- Thread it through the first hole (A) from right to left.
- Pull the thread between the two tension discs, then through the second hole (B) from front to back.
Step 4: Thread the Tension Dial and Guides
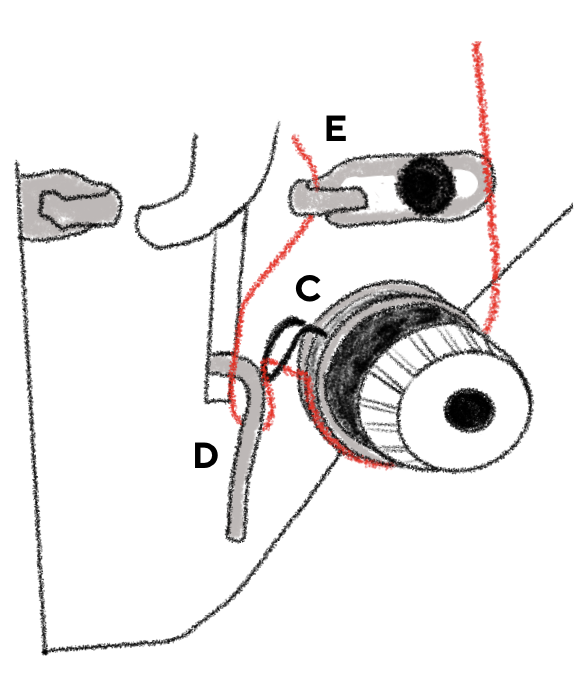
- Continue by pulling the thread through the two back tension discs on the dial.
- Loop the thread through the flexible wire hook (C).
- Pull the thread under the metal hook (D).
- Bring the thread up and insert it into the metal loop (E).
Step 5: Thread the Metal Lever and Hooks
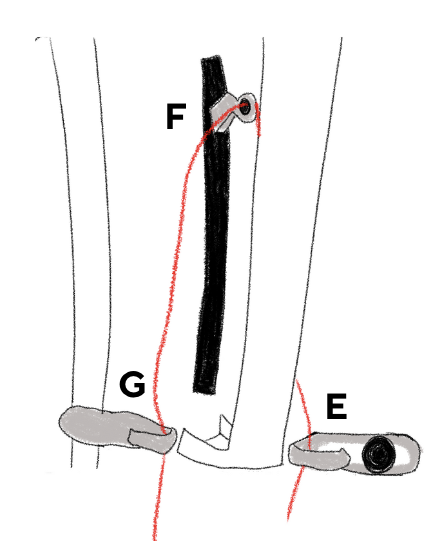
- Pull the thread up to go through the small hole on the metal lever (F) from right to left.
- Thread it through another metal loop (G).
Step 6: Finish Threading
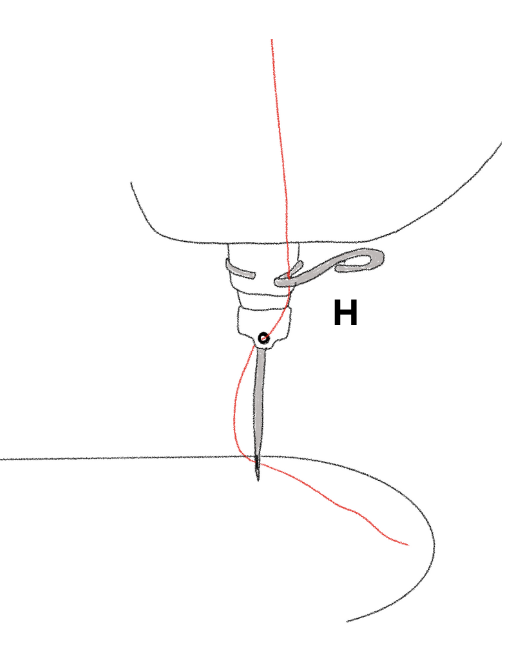
- Hook the thread through the curvy metal hook (H).
- Pull the thread through the small hole in the needle bar from front to back.
- Thread the needle from left to right.
Conclusion
I hope this guide has made threading your Juki DDL-8700 a breeze! Remember, practice makes perfect - you’ll be threading like a pro in no time.
Need a handy reference? Download the PDF version of this guide here. Print it out and keep it by your machine for quick access.
If you found this tutorial helpful, consider supporting Joanna Blüm Studio. Your contribution helps us continue creating free patterns and sewing resources for the community.
Buy Joanna Blüm Studio a coffee 💕
Happy sewing, and stay tuned for more tips and patterns coming your way! 🧵✂️💖”