Sustainable Sparkle: DIY Reusable Makeup Remover Set
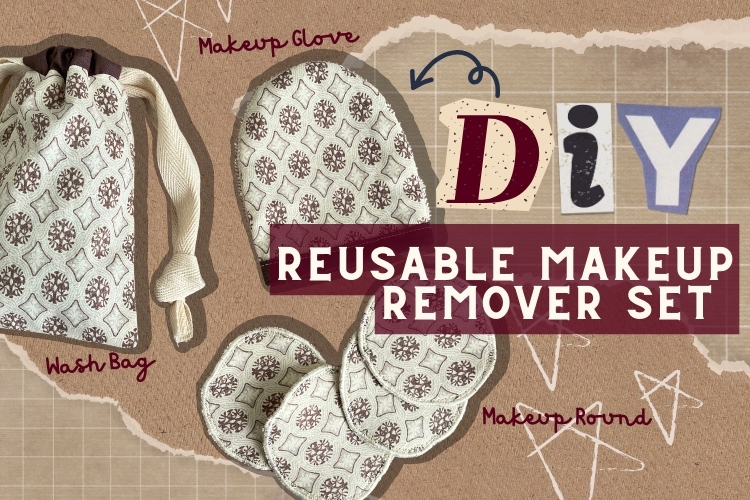
Explore creativity with our ‘Sustainable Sparkle’ DIY Reusable Makeup Remover Pads & Wash Bags tutorial. Elevate your routine with a touch of eco-friendly glam! ✨💚
I used to use a lot of cotton circles and disposable makeup wipes, and I really felt guilty about it. Fortunately, I came across a great deal on terry cloth fabric during the Black Friday sale. When I was searching for inspiration to create something, this idea immediately clicked for me! Here is a free pattern you can use (I know this project is super simple and may not even need a pattern, but I just wanted to make your life a tiny bit easier). Let’s get started! 😀
- Download Pattern 💕
- Please note that the bias binding tape guide serves as a reference and may not precisely match the size required for this project.
Gather Your Materials:
- Scraps of fabric of your choice
- Terry cloth fabric or a similar fabric of your choice
- Strap/Ribbon for the wash bag strap (if desired)
- Sewing clips (or pins)
- Fabric scissors
- Ruler
- Sewing machine, needle, coordinating thread
Optional
- Fabric marking pen or pencil
- Seam creaser or chopsticks
- Fabric glue
- Walking Foot
- Overcast Foot (if needed)
Cut the Fabric:
Makeup Gloves
- 1 piece of glove body with your self-fabric.
- 1 piece of glove body with your contrast fabric (terry cloth).
- Bias Binding (Size should be 9 3/8”: 7 3/4 (finished size) + 1 5/8 (binding width)).
Makeup Rounds
- Cut as many circle pieces from your self-fabric as needed.
- Cut as many circle pieces from your contrast fabric (terry cloth) as needed.
Wash Bag
- 2 pieces of Main Panel with your self-fabric.
- 2 pieces of Upper Panel with your choice of fabric.
- 2 approximately 24” straps of your choice. I suggest using something about 1/2 inch in width.
How to Make a Makeup Glove
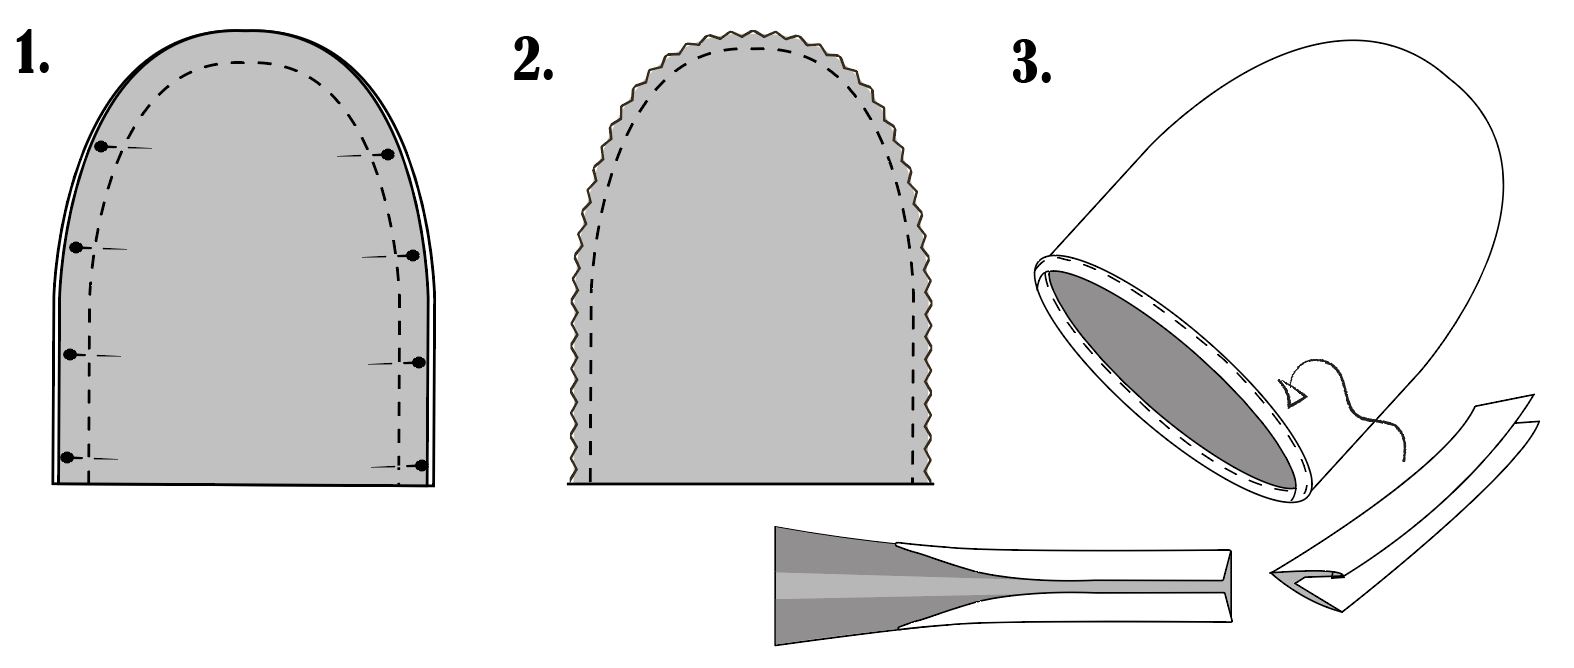
Step 1. With the right side together, sew the seam allowance on the 3/8” side and top of the glove.
Step 2. If you have pinking shears, cut the seam allowance. If not, just cut it, and maybe clip because of the curve. Flip to the right side and press it nicely.
Step 3. Do the Bias Binding Finish. I’ve included a bias binding tape guide in the free pattern. There are many techniques on how to sew bias tape correctly, and my best instruction is this one by Seamwork.
How to Make Makeup Rounds (Cotton Circles)
If you have a serger, this process is very easy and breezy. Simply cut the circles and, with the wrong side together, serge the edges by circling around.
For this post, I’ll share a clever way to mimic an overlock stitch with your regular home sewing machine. My machine is the Singer Heavy Duty 4452, so for those of you with a different model, please understand that some features might not be available on your end. However, I’m confident that most regular home sewing machines have the features I’ll be using for this tutorial.
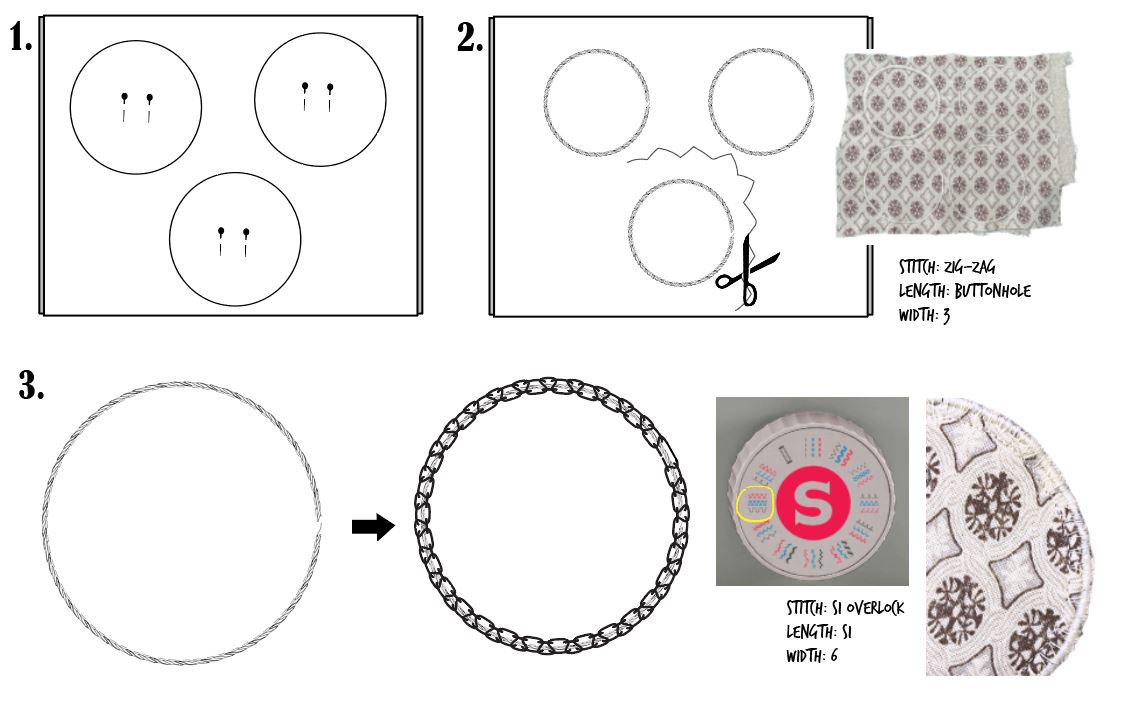
Step 1. Using the circle guide (or any circle shape), draw the circles on your fabric. Please don’t attempt to draw on your terrycloth; it will be a disaster. Draw however many circles you want to make. Note that the distance between each circle should be at least 3/8” apart. DO NOT CUT THE CIRCLES. When you’re done, pin the fabrics together with the wrong sides facing each other.
Step 2. Do the satin stitch around the circle edge. Here is a quick tutorial on how to do a satin stitch with your home machine. Set up for a zigzag stitch with a buttonhole length. You can choose the width of your choice, but for this particular project, it looks best when the width is set to 3. For this step, I highly recommend using a walking foot, but it is totally optional.
Step 3. Cut the circles along the satin stitch line. Now, choose the overlock-ish decorative stitch on your machine, then apply it to all edges. For an easier process, use an overcast foot for this step. I chose the decorative stitch above on my machine that looks the closest to an overlock.
Step 4. Press, and you’re done.
💠 You might wonder why we need to do Step 2 (Satin Stitch Part) before Step 3. Because terry cloth frays like crazy, doing Step 3 alone can be very challenging and annoying, and it doesn’t result in as neat of a finish. Plus, it looks more like an overlock finish.
How to Make a Wash Bag
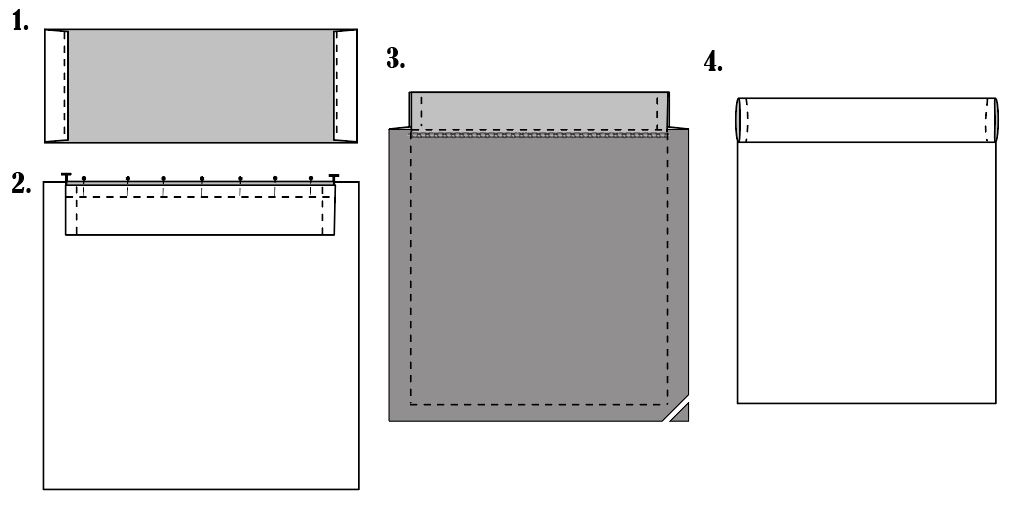
Step 1. Sew the side seams (3/8”) for the upper panel pieces, then fold in half and press.
Step 2. On the right side of one of your self fabrics, sew the raw edges of one of the upper panel pieces. Notch from notch on the self fabric. Repeat the same for the other pieces.
Step 3. Press the seam allowance; optionally, you can serge, zigzag, or use pinking shears on the excess.
Step 4. Now, on the wrong side, sew the side seams and bottom seams at 3/8”. Once done, clip the corners and cut any excess fabric. Flip to the right side and press it nice and neat.
Step 5. Cut the straps about 24” long.
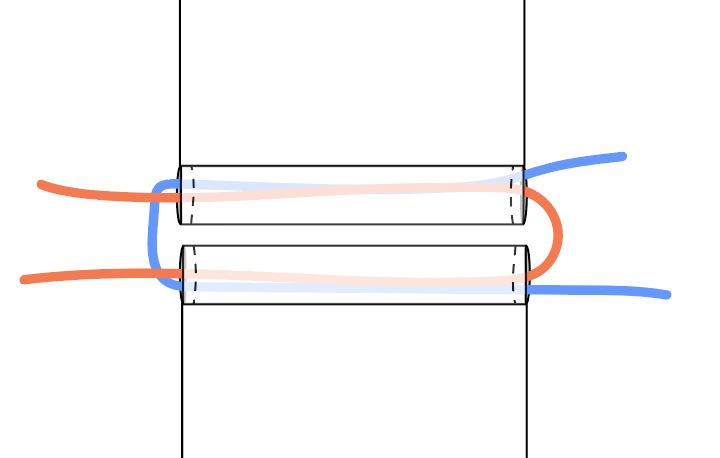
Step 6. Thread the first cord through the entire drawstring casing using a safety pin or bodkin. Begin on one side, pass through the casing, and return through the casing on the opposite side of the bag. Tie the ends together securely.
Step 7. With the first cord securely in place, attach a safety pin to the second cord. Starting on the side without a knot, thread the second cord through both casings, ensuring the ends meet on one side of the bag. Tie them together securely.
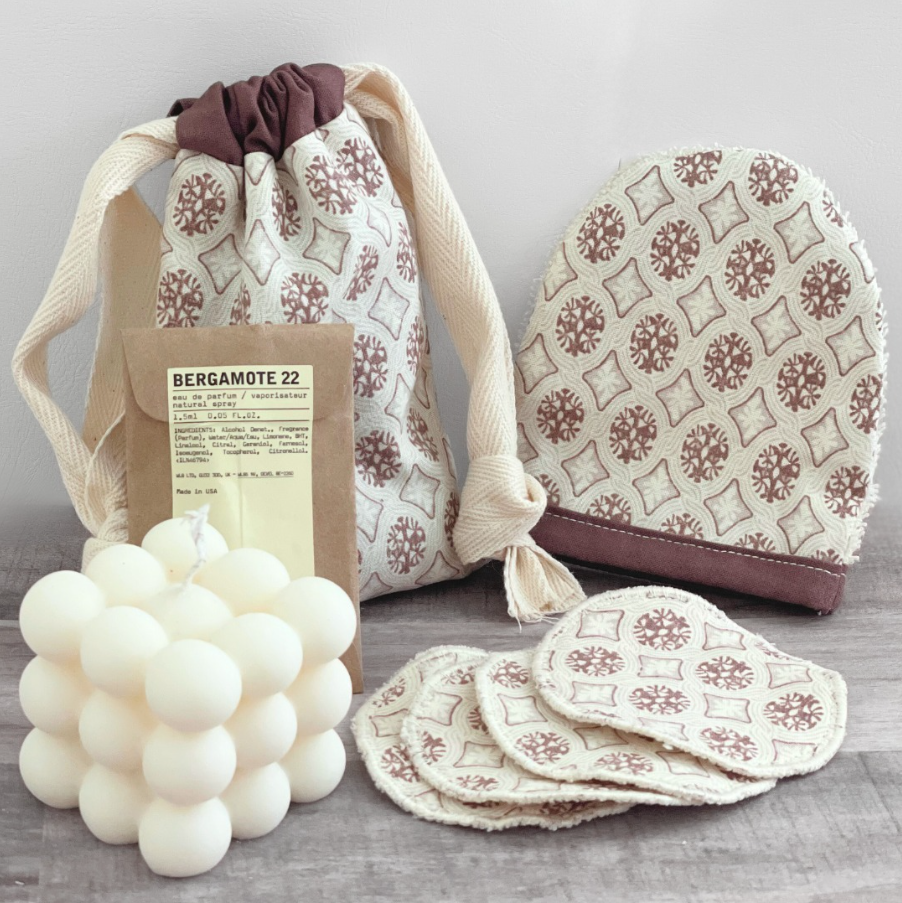
💠 Congratulations on completing this eco-friendly DIY project! You’ve just crafted a perfect gift for your loved ones. By adopting this sustainable approach, I hope more of you will join in reducing the use of disposable makeup items. Here’s to a more environmentally conscious and beautiful journey ahead! 🌿💄